|
DIY SOLAR CONSERVATORY EXPERIMENT HERSTMONCEUX MUSEUM
|
|
|
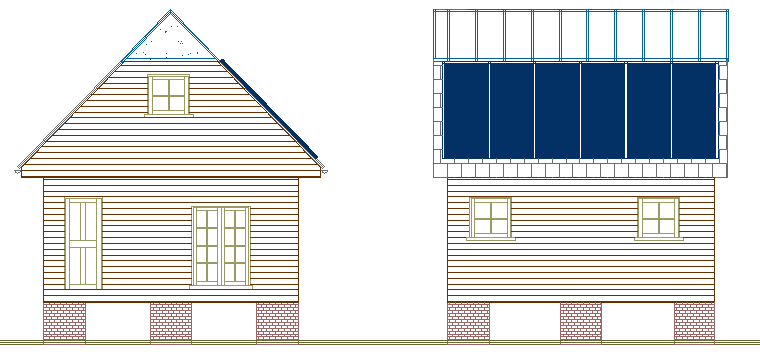
A nicely integrated solar home - as far as we know the 1st proposed. But what if your house is already built and you want free solar heating? This page is dedicated to the build of a solar conservatory onto the Museum at Herstmonceux in Sussex. A flatpack like that above can be installed in days. A conversion takes far longer.
IS FREE CENTRAL HEATING POSSIBLE?
Yes it is. The problem is containing costs. DIY is one way of keeping costs down. Reusing (recycling) metal is another way of reducing costs. During this experiment we will be using materials saved from house renovations that would have been scrapped. We will also be doing all of the work ourselves - and if we can do that, so can you.
BASIC
SYSTEMS
THE BEST LAID PLANS
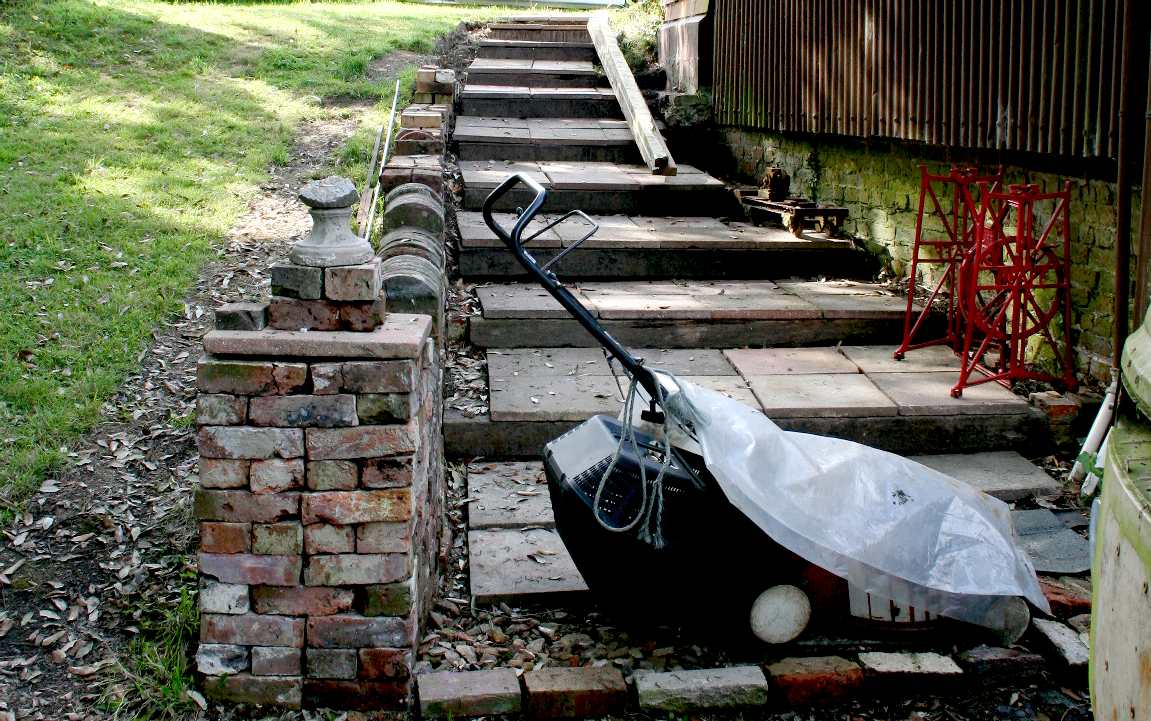
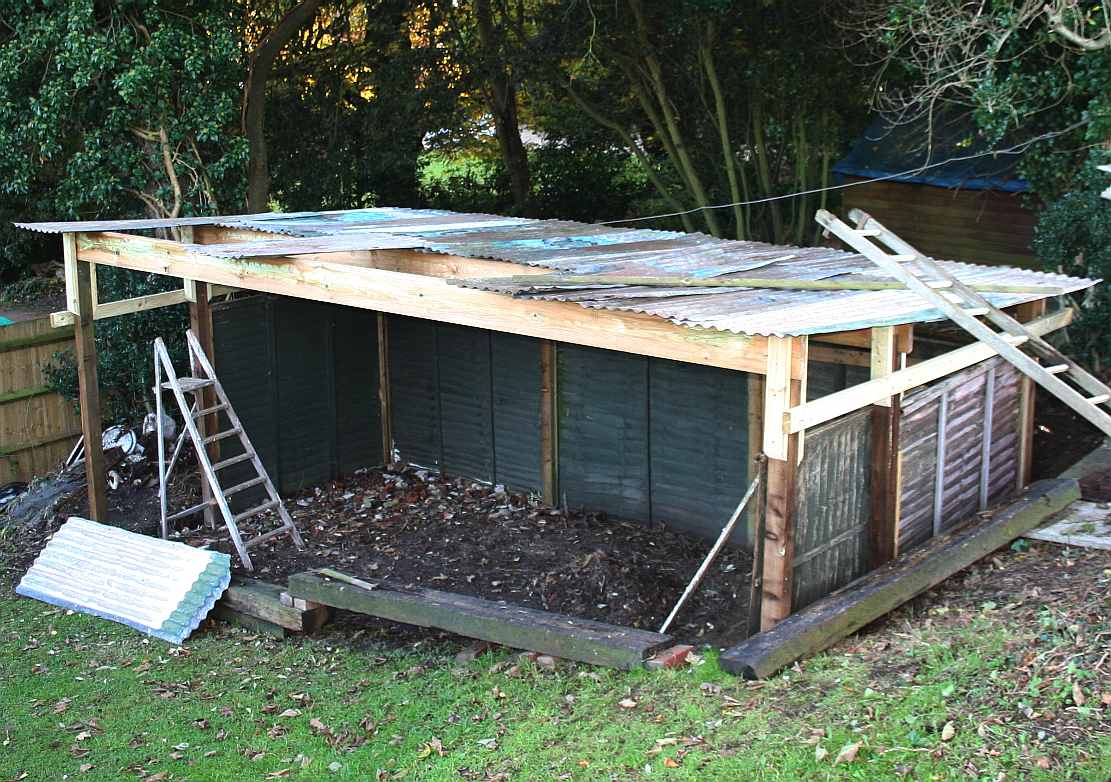
The timber was ordered and delivered very efficiently by Stamco's Eastbourne branch, exactly when they said they would. Having unloaded and graded the timbers, we then had to prepare the site, which included removing an old lean to. The problem was where to put all the items stored there-under. Obviously, we'd have to reposition the lean to, or throw away most of the stored bits and bobs.
You must be joking. We never throw potentially useful items away. In this case one item worth saving is a solar powered rickshaw prototype. So, before we could construct the Solar Conservatory we'd have to move the lean to. But where to put it? The only practical place was a patch that we used to store building hardcore - and of course, that meant moving the hardcore temporarily. More grunt!
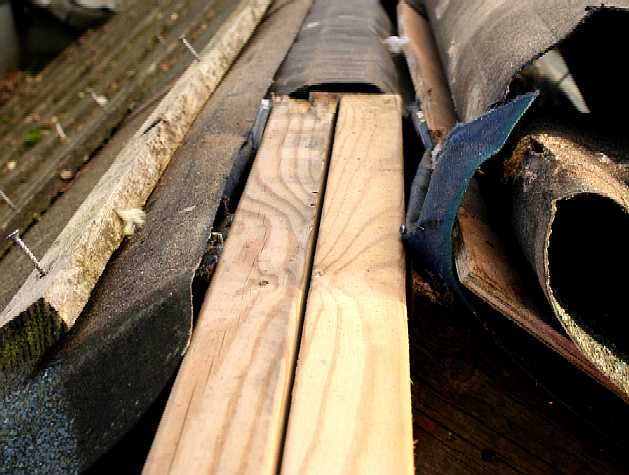
You can see what a mammoth task this was from the pictures below. One nice thing is that we are re-using the 2nd World War corrugated iron for the roof. This sheet material is for the most part in good condition. It came from the Generating buildings from renovation works (timber treatments). Why waste it!
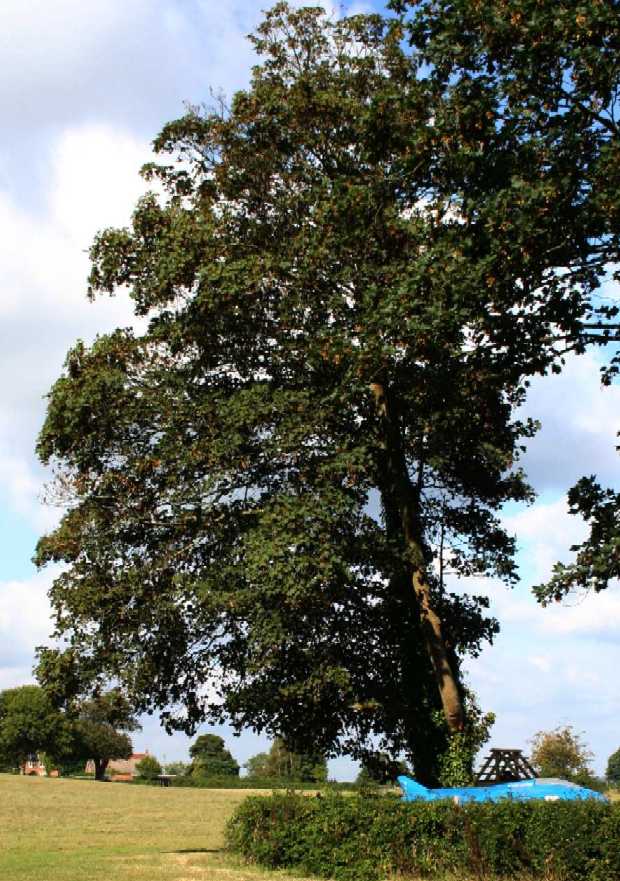
TREE PRESERVATION ORDER (TPO) - SYCAMORE ROOTS
You might ask the same question that we did: why was there a tree preservation order on trees that everyone knows are weeds. These trees are dangerous to foundations. Sycamores are not even native to the UK. They seed incredibly easily and for that reason are the kiss of death to any building that in unattended. Why then would a council place a TPO on trees close to a historic building? That's Wealden District Council for you. You'd be forgiven for thinking that they were trying to cause harm to this building, rather than protect such valuable history. It is every council's duty to protect historic buildings - ask English Heritage for advice if in doubt.
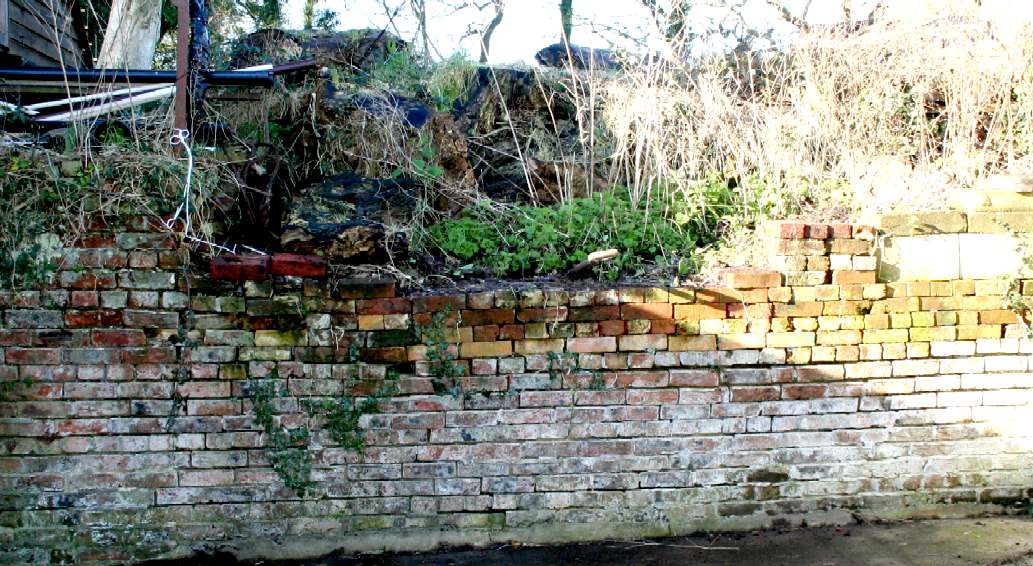
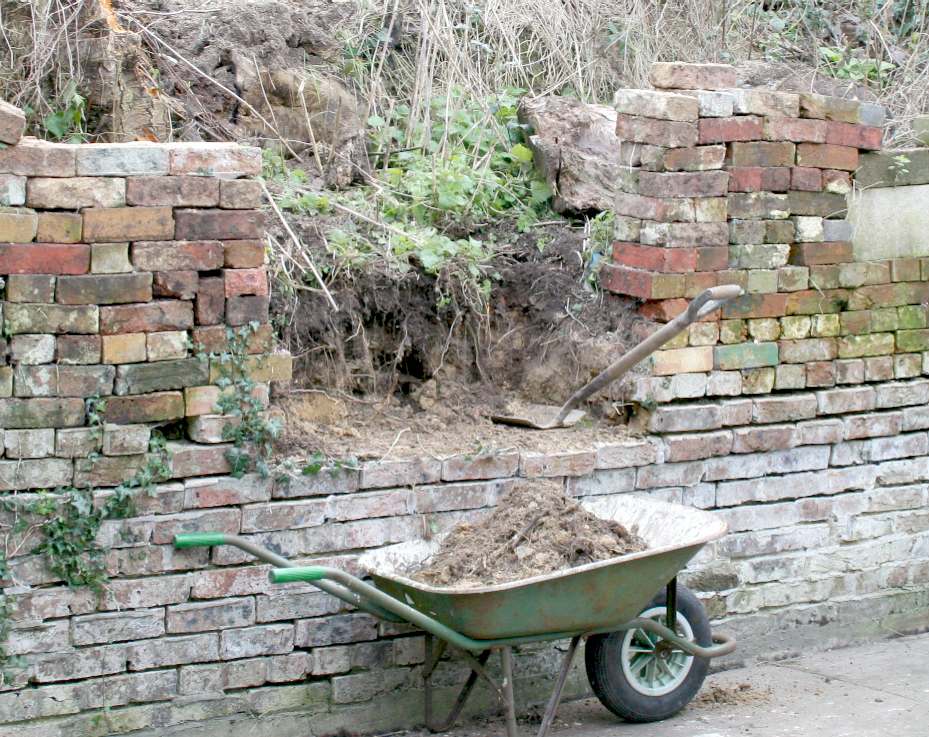
SYCAMORES - Several weed trees had been included in a Tree Preservation Order by the Wealden District Council many years ago. Most of these trees have gone, but two were left that are now causing a great deal of damage as you can see from the photographs above revealing wall buckling, etc. The tree concerned is quite a tall specimen. Because sycamores grow so quickly, their root system will affect nearby buildings up to 30 feet away. This tree is right next to a courtyard wall. As you can see the wall had been pushed over at the top and the middle is bulging from root pressure. It all happens so slowly that you might think no damage is occurring - but it is and it is expensive to remedy. We now have permission to take these trees down, thanks to an arboriculturalist who took the time to visit the site and could see what was happening.
SITE CLEARANCE - The old lean-to in the north courtyard has now been relocated and is useable, even though not fully completed. Treatment has begun on the sycamores to prevent any more growth. This is the time of year to remove so as not to upset any bats living in the area. The Trust carried out preliminary investigations, including several dusk sittings to be sure no bats were using these trees. They are very fond of bats. You can see from the left picture how 9"x2" timbers were placed near the well ready for installation. In the right hand picture, a beam is positioned with 4"x2" cross bracing - but exceptionally heavy rainfall from October 19th 2013 through to February 26th 2014 halted play. Wasps were particularly aggressive during this period and the cold nights were drawing in. Oh for the summer again.
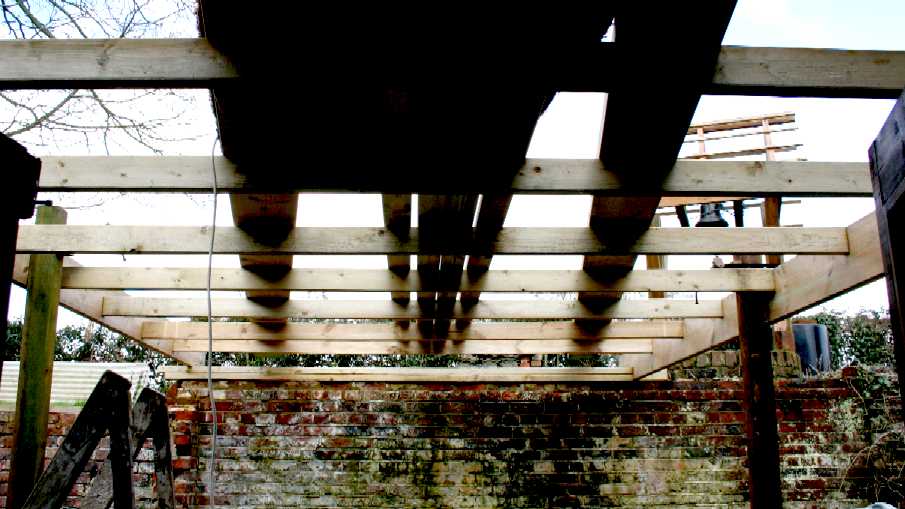
WALLS & JOISTS - Here you can see the joists spanning from one wall header to the other. We bought our steel fixings from Screwfix and Tool Station in Eastbourne, consisting of round wire nails 125mm and 150mm. It is better to align a joint and drill a pilot hole that is slightly smaller than the nail. That way the wood does not split and accuracy of assembly is improved. It does though take longer doing it that way but if you do a job properly, you only do it once. This is the view from underneath. You can see the wall-plate at the far end, which is fixed to the wall with a damp proof membrane underneath. Victorian gardens used wall like this to accelerate vegetable production. The brick absorbs heat and releases it at night that plants grow faster.
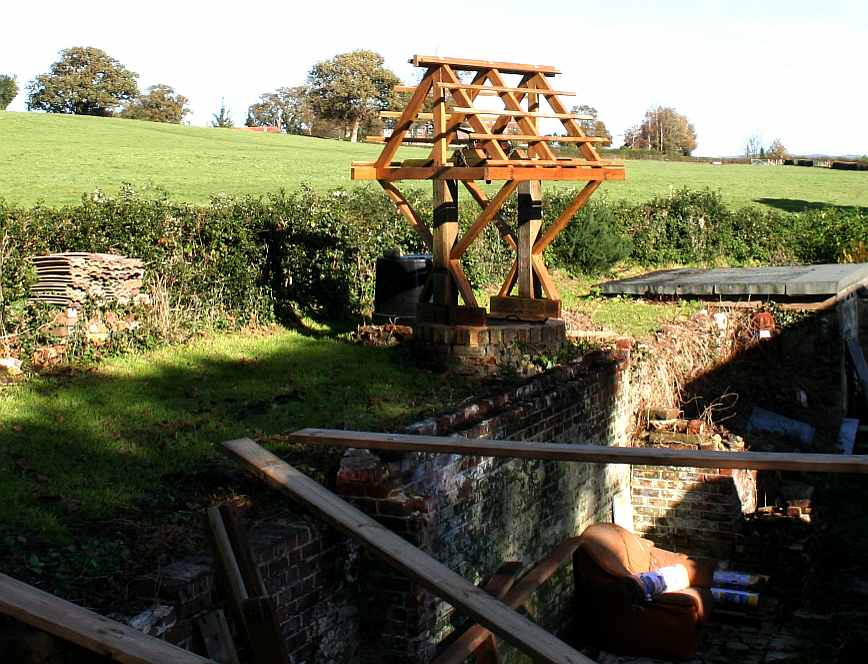
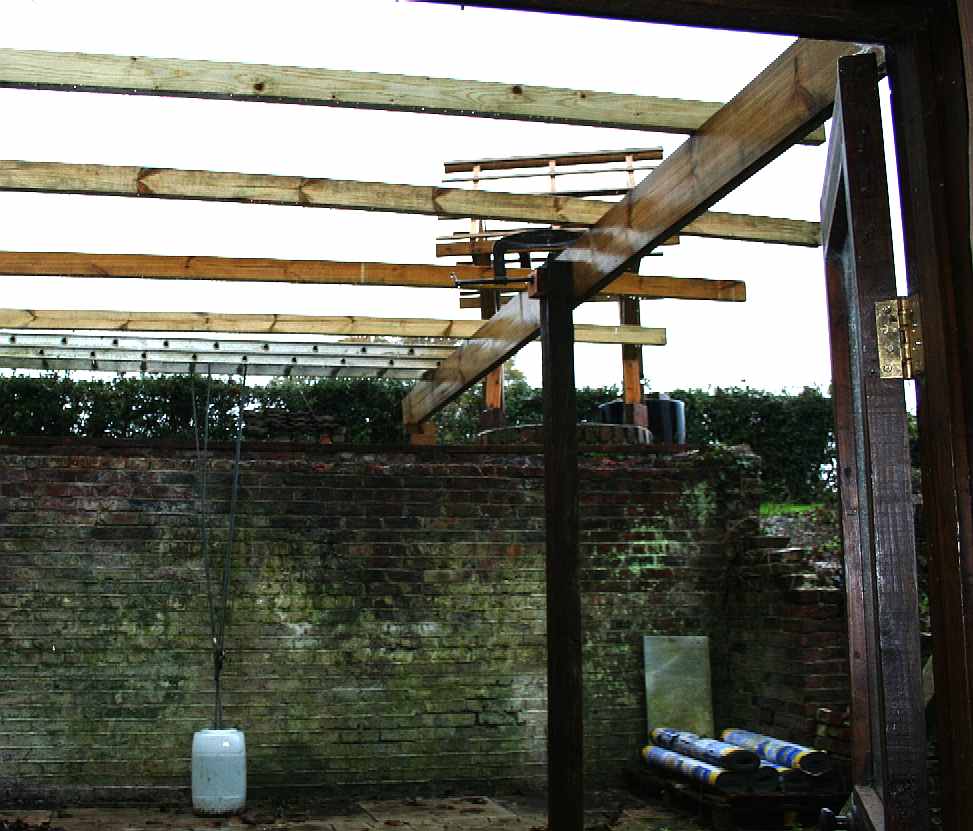
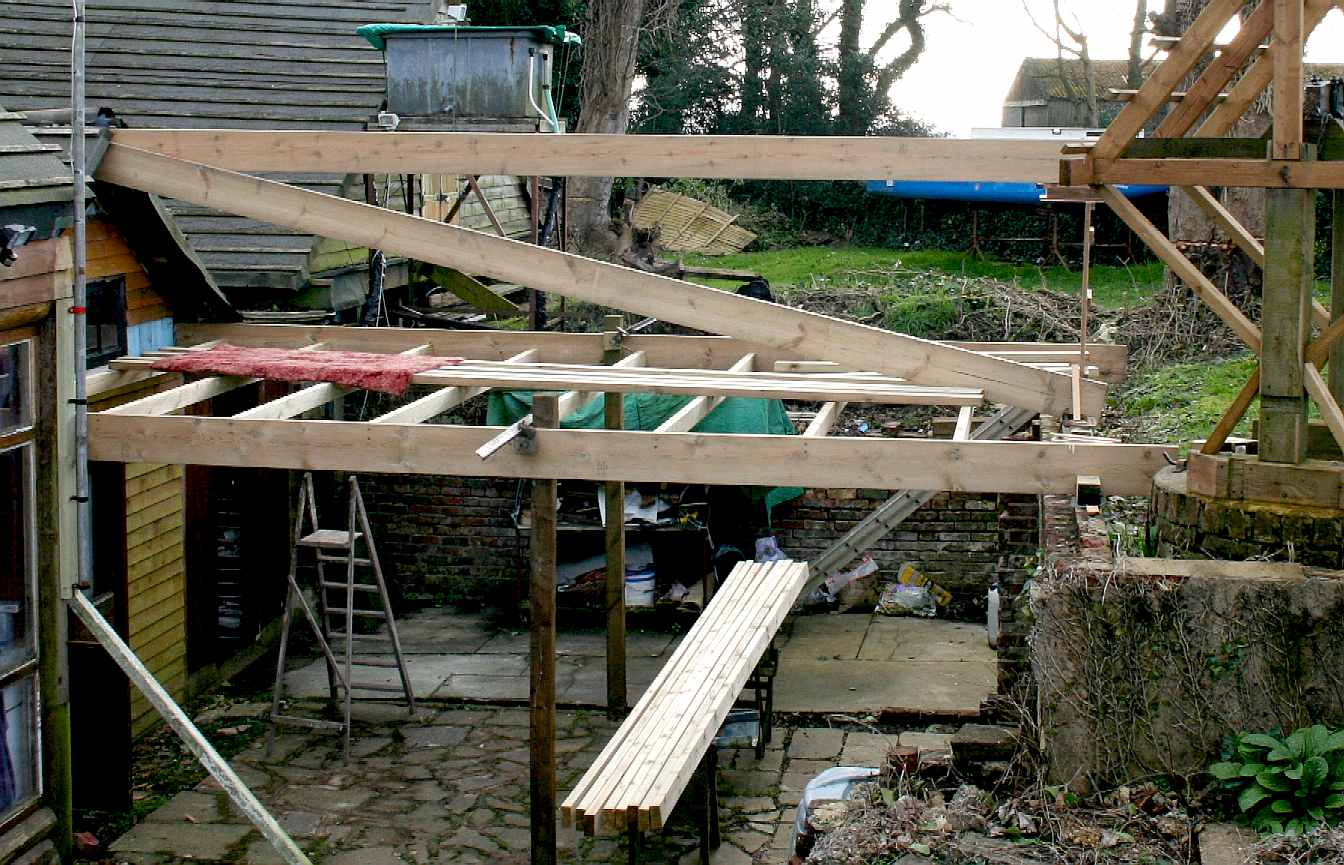
GETTING ALOFT - Don't forget that these are not pre-fabricated trusses. These are hand cut and fitted in the old fashioned way. In modern building, trusses are brought onto site by a truck pre-assembled and then craned into position. Here, we had to manually lift the timbers into position, so you might enjoy seeing how it is done. Note that the joists appear higher on the left than on the right - and that is because of the lead lined gully on the left that will need a shielded internal drain, where at the moment the rainwater goods are non-existent from years of neglect. The joists are of course level, but the right hand wall header is about 200mm or 8" higher.
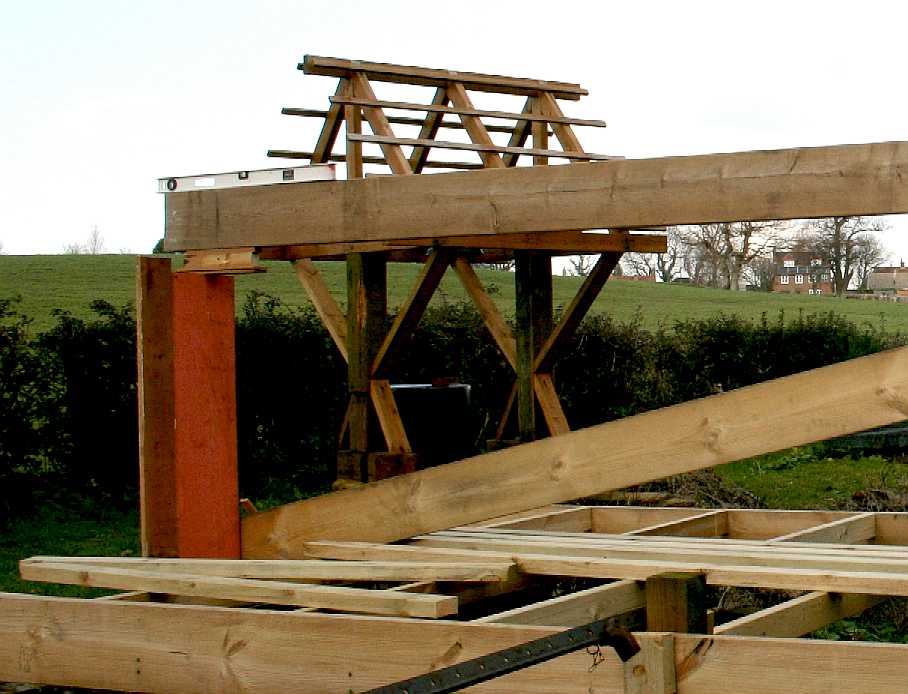
MAKING GOOD - The 225mm x 45mm ridge beams are 6 meters long. One man would struggle to lift both at the same time (he tried) and position accurately. But, before any of that, the beams needed to be tied into the existing wall structure. That is easier said than done. In this case an alligator saw was with a sharp wood chisel and several crowbars. You can see on the right that the roofing was loosened and the breather and felt cut and folded to allow the new beams to pass right across the existing wall. That is not going anywhere.
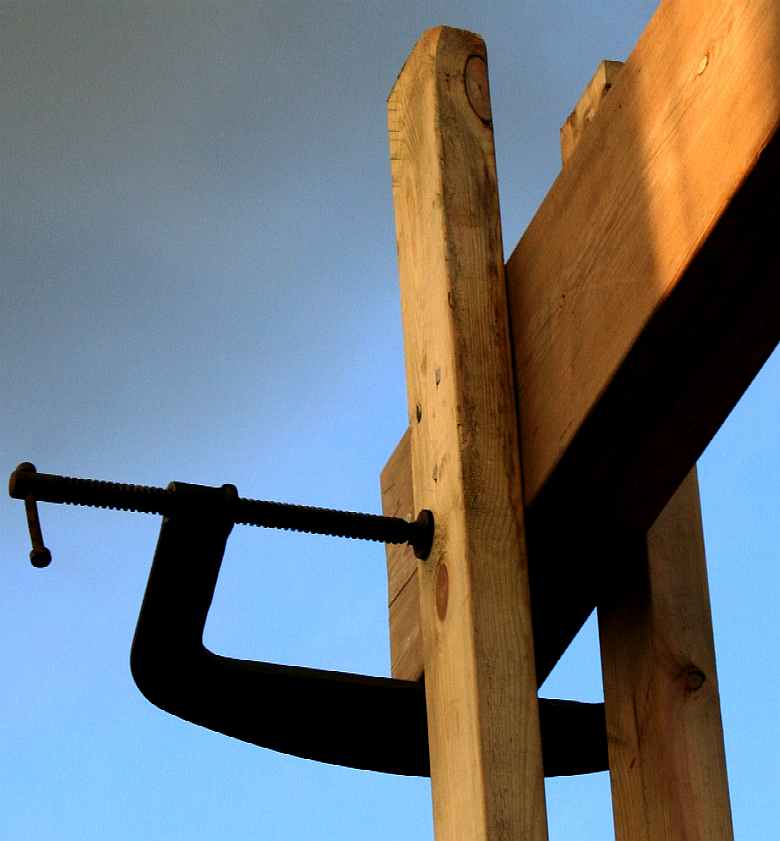
ON THE LEVEL - A one man job? Yes it was. You can see here how one beam was lifted into position with a temporary support. Timber fillets were then placed underneath the beam until the spirit level showed that the beam was horizontal. Sometimes one will have to slant part of an extension to match the original building so that it does not look odd. Once the height was correct, the timbers were clamped in position before being nailed permanently.
BALANCING ACT - When a craftsman builds, everything is done by eye using plumb-lines and a good spirit level. These are the most basic tools for any builder. When first setting the height of the wall-beam on the far right, to wall beam on the wall-plate on the far left, a laser sight was used to get ballpark heights about right, so as to calculate timber lengths for ordering. Modern accessories like this are useful. How did the Egyptians manage?
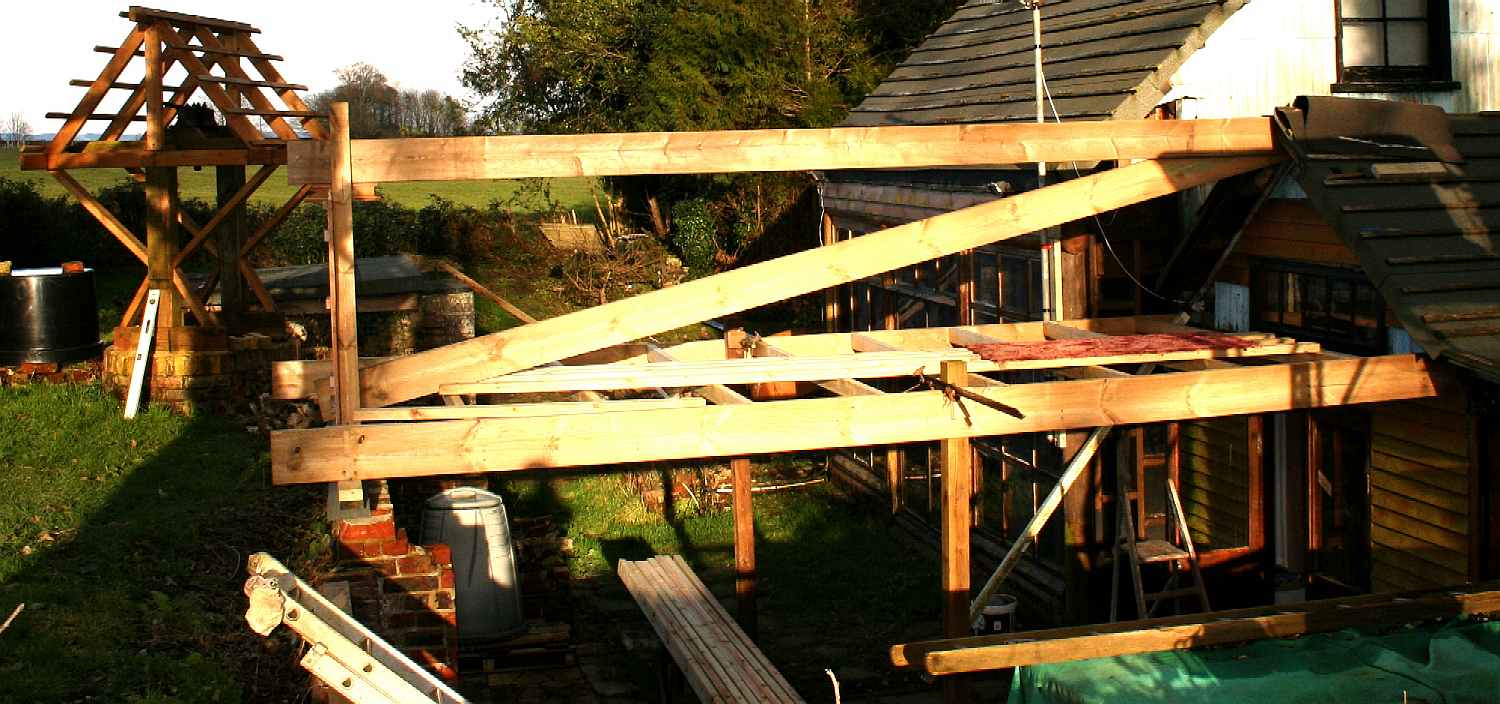
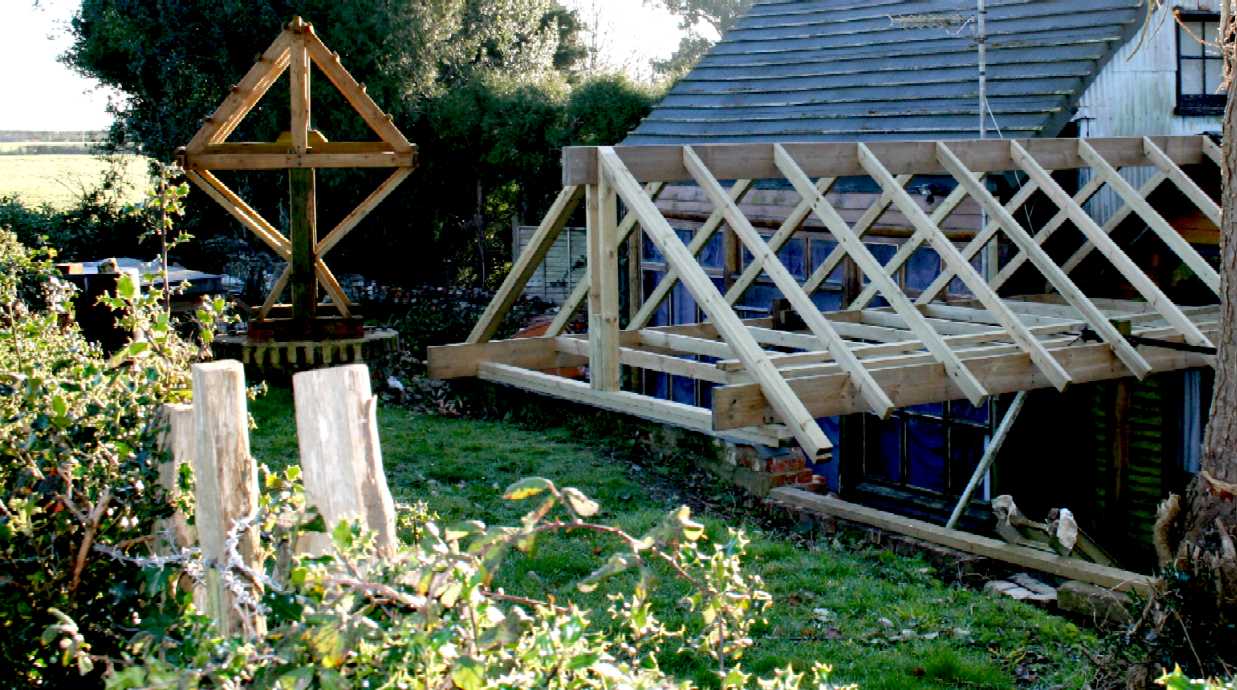
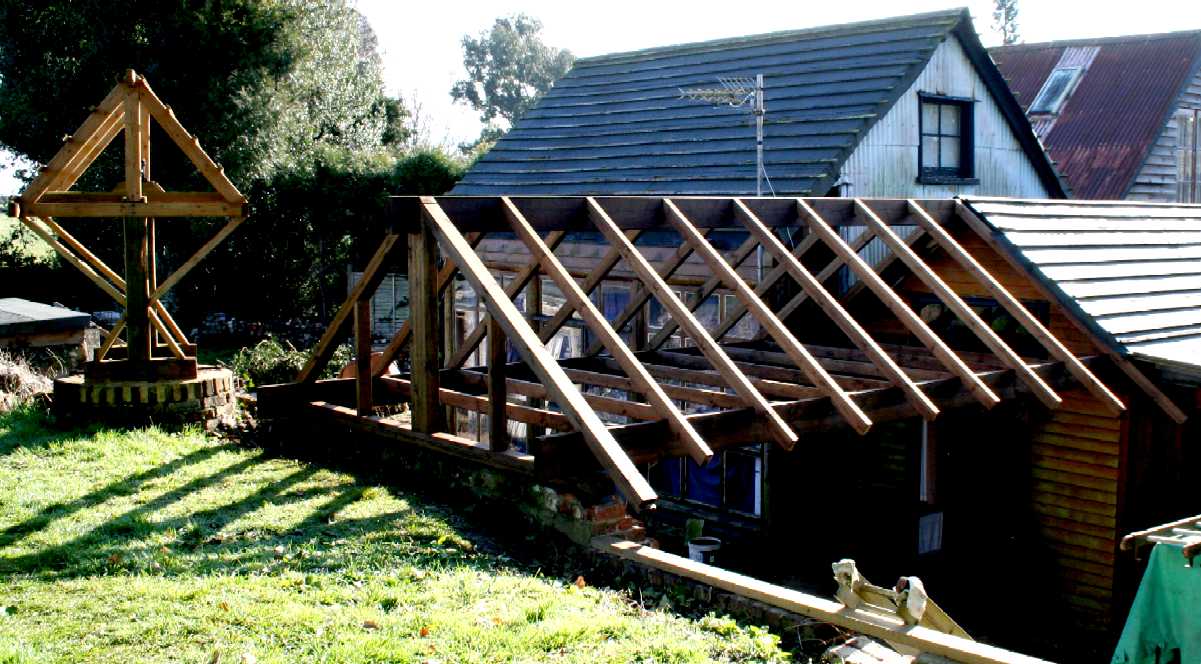
CALM BEFORE THE STORM - Like all building sites, it all looks such a mess before the job is done. Here you can see the 4 x 2" timbers in the courtyard below that will be cut to make the rafters. Don't forget that this is a solar conservatory. The roofing material will be glass. Glass is a wonderful material that is underused. Glass is the secret to cost effective heat capture. The total budget for materials is less than £2,000. So far the project is under £1,000. DIY is a great way of saving money.
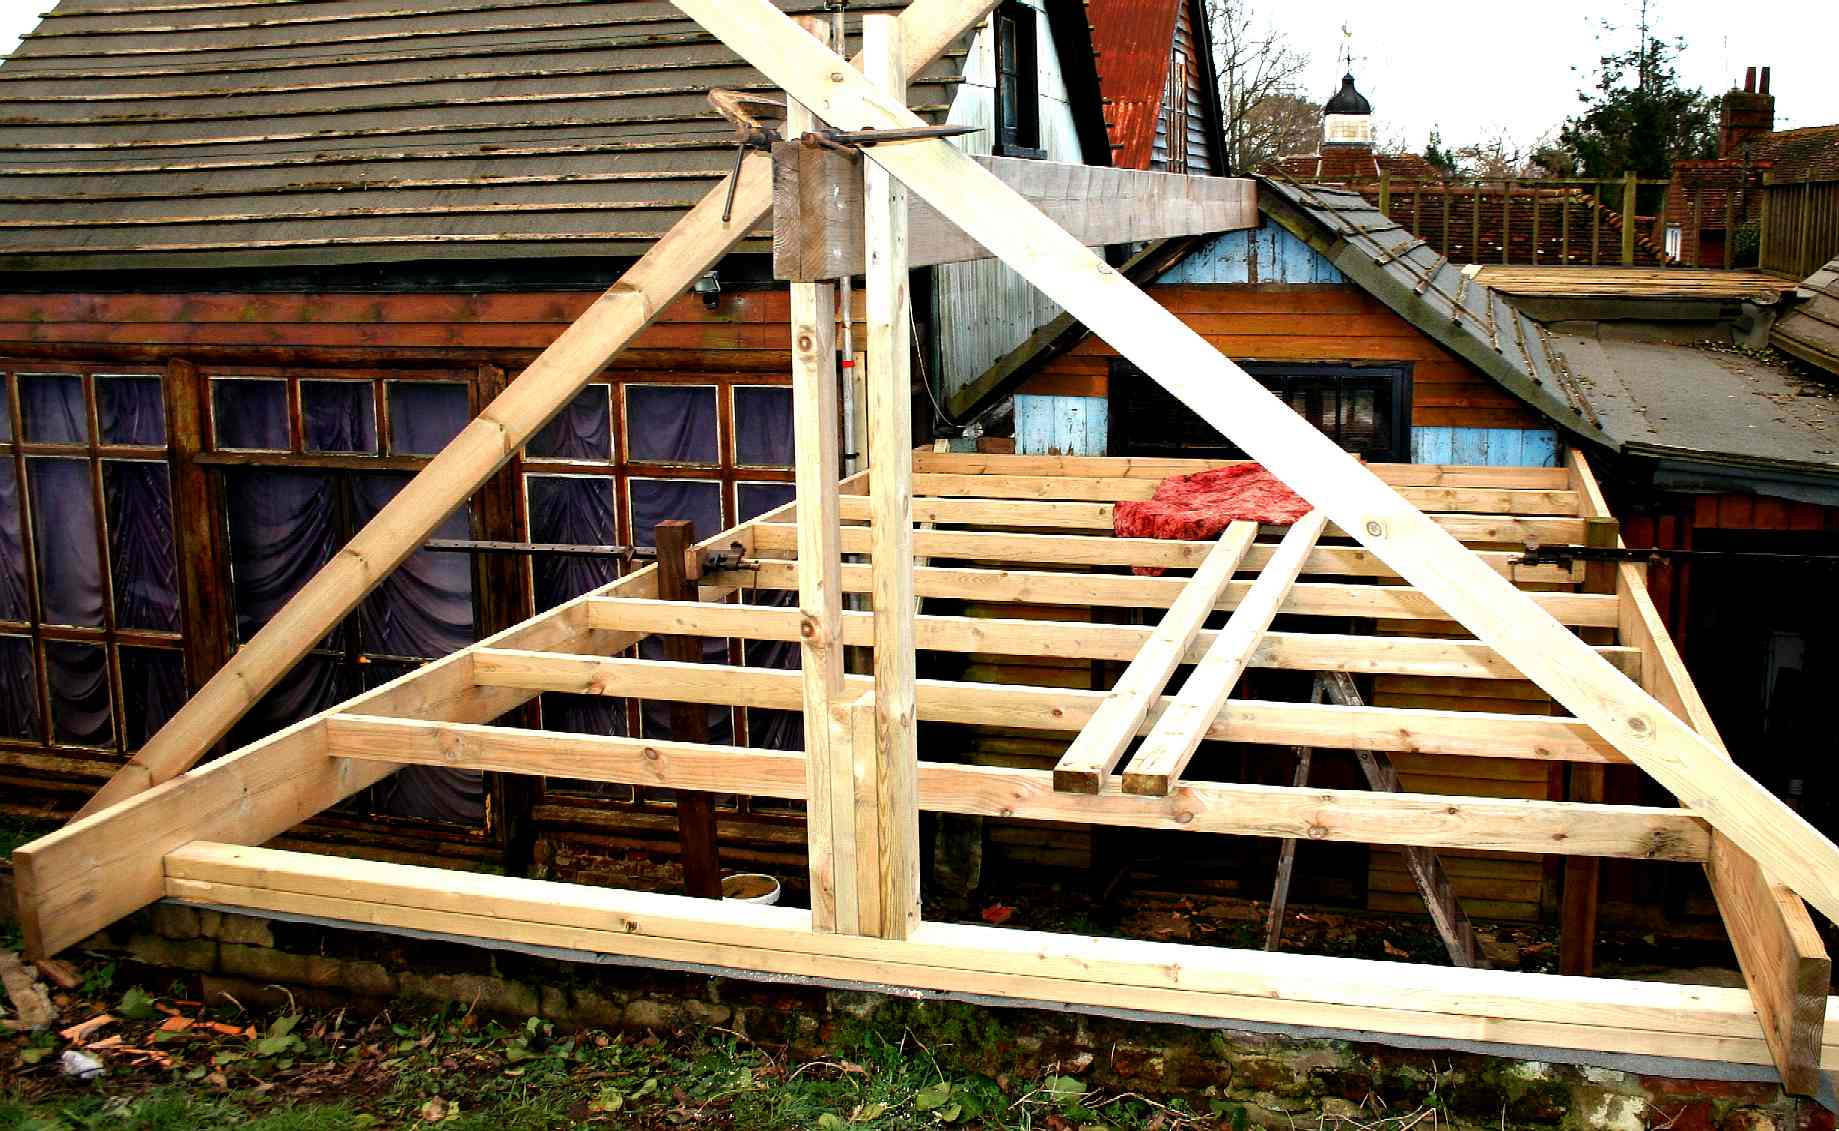
GABLE END - You would be surprised how many people get the basics wrong. Having set the height correctly, the ridge beams need to be centralized with the gable end. A tape measure is used to check this, but also make sure the the sight line is in accordance with the building that is being extended. The rafters will complete the woodwork, when a spirit level should be used to check that the central support timber is upright. Then the glazing can begin. But before fitting the glass roof, the heat collectors should be hung from the main beam. This will require some blacksmithing and welding to make the custom mounts. Always walk around a building to make sure the angles look right.
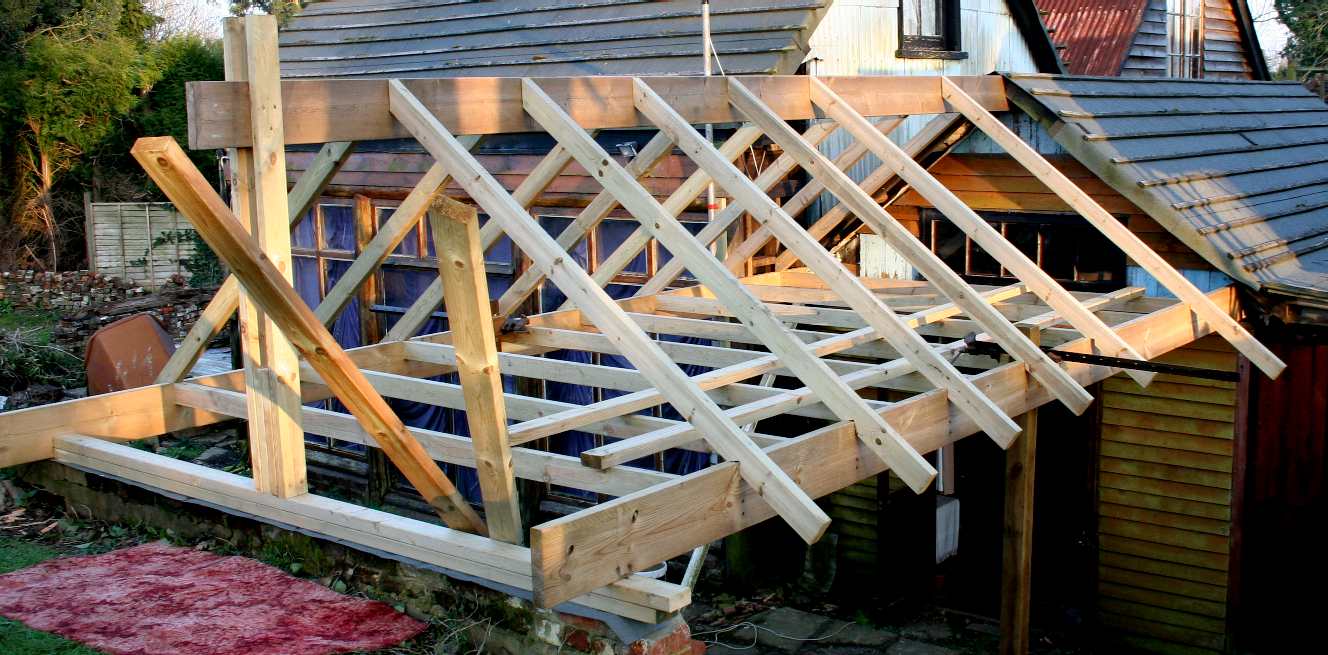
RAFTERS - A few nice days makes all the difference. The timber stockpile is now disappearing as the solar conservatory takes shape. Every one of the rafters was a different length because the wall end to building end was not square - of course not - what building is. But back in 1900 tape measures were not so accurate and local skills were variable. That meant a different angle on the notches x 16 rafters. The gable end is still to come.
RAFTERS - The sun sets on another Saturday leaving just two more rafters to fit. We're looking forward to making the gable end, which will also be glazed. We've seen the light and we like it. Note the pink carpet in the foreground. Our chippie wiped his feet before clambering on the structure. How else do you fix the timbers in place. Imagine the mess if the mud from the garden was trampled all over the structure. Don't forget that timber is a sustainable building product. So next time you see a lumberjack, shake his or her hand.
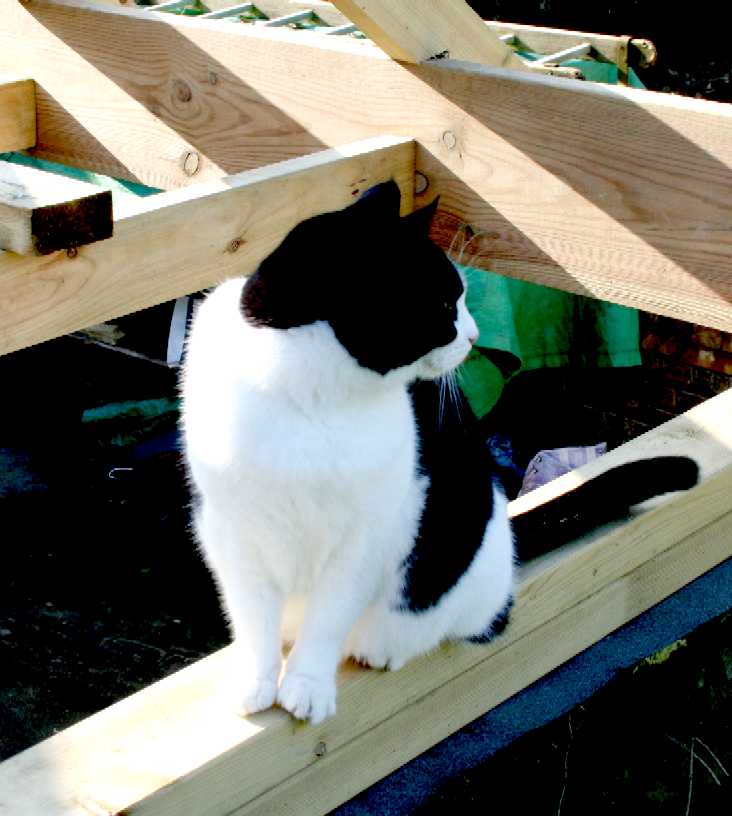
THE FOREMAN - Meoowww, and good day to you Mr Pussycat. A visiting feline inspects the woodworks for his beam acrobatics in time to come. We call this black & white traveler 'Regent'. He'd been chasing a mouse that had taken a shine to the attic that day. So, a big thankyou to Regent for keeping the building rodent free.
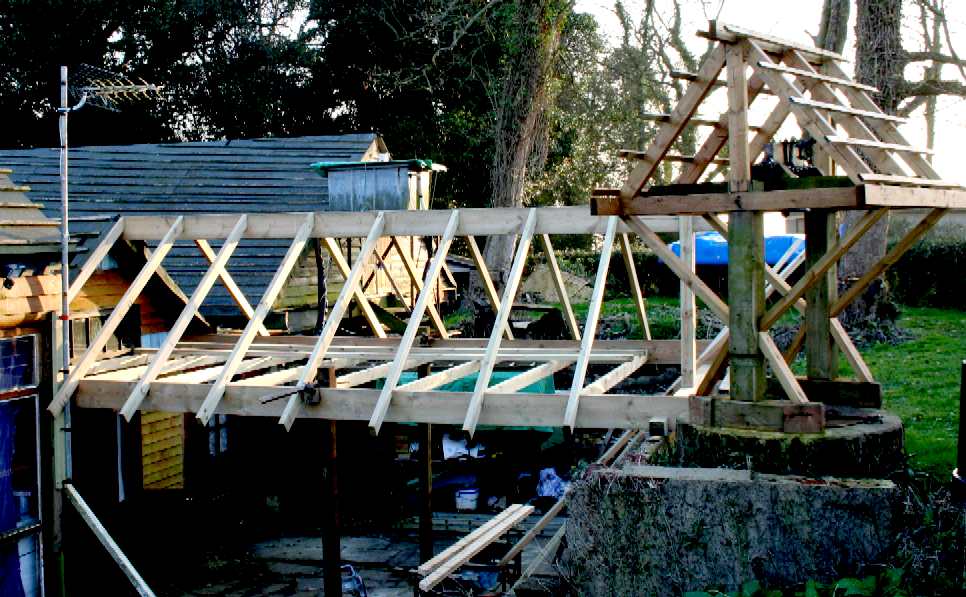
GABLE END - Morning sunrise at Herstmonceux March 16 2014. The gable end is now taking shape. The radiators to be used as heat collectors will soon be painted in matt-black and mounted underneath the ridge beams. After that the plumbing can begin.
TREATMENT - March 17 2014, despite the fact that the timbers used were tanalized, a further treatment of Wickes PTI based "acorn brown" wood preserver has been applied. This has the effect of matching and therefore blending the new structure with the original. The overhangs have yet to be cut to size, but the gable-end is now complete with uprights. Once dry, the heat collectors can be slung in place. We are thinking about a bracket system that allows fast removals for servicing.
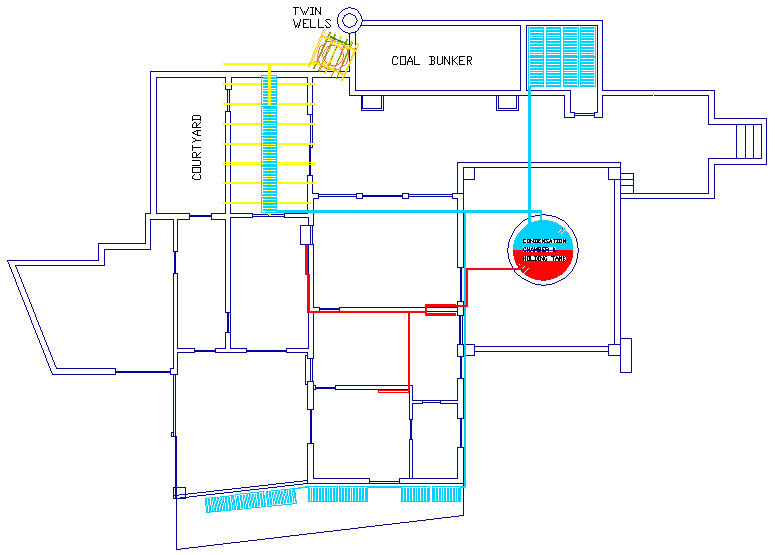
CIRCUIT DIAGRAM - The solar conservatory, the subject of the present build is shown in the top left of this site diagram (with timbers in yellow). The water well is also featured just to the right of the solar conservatory. Heat collectors and feeds are shown in light blue and the central heating radiators and piping is drawn in red. Another conservatory to the south is also to be plumbed in to the underground holding tank, along with a third unit above a WWII Anderson shelter, shown top right, which concentrates the low grade heat collected. Heat that is collected during the day may be fed into wall mounted radiators in the usual way. Please note that the underground holding tank, which is a converted condensation chamber, is to work much like an immersion heater tank - and is not divided in two as shown, but simply drawn like this for convenience.
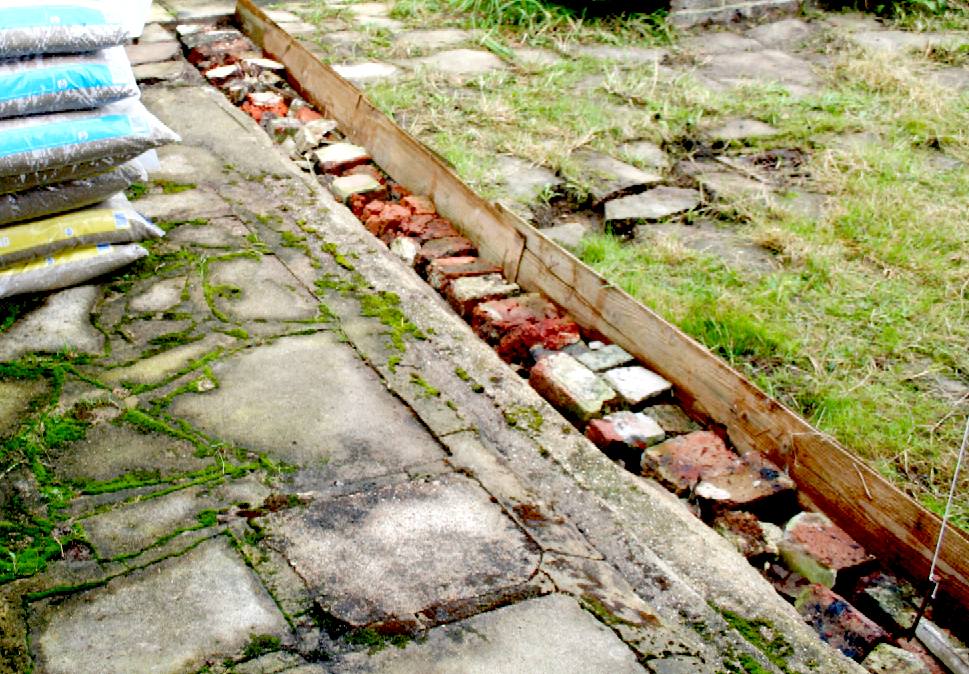
FOOTINGS - October 15, as luck would have it the existing footings are just a few inches to one side of where we want our frame to connect with the roof structure. In building you will come across this sort of inconvenience all the time. What that means is digging a trench into which to ram hardcore, before pouring concrete. Use a plumb line to make sure that your trench is underneath the beam you want to mate with. The depth of a footing depends on the load it has to bear. In this case the load is not great and the soil has been stabilized. What that means is we only need to dig down to a depth of 300 - 600mm. If this was a house, we'd be looking at 2 or 3 meters depth. We were latching onto an existing footing making this foundation about a meter wide.
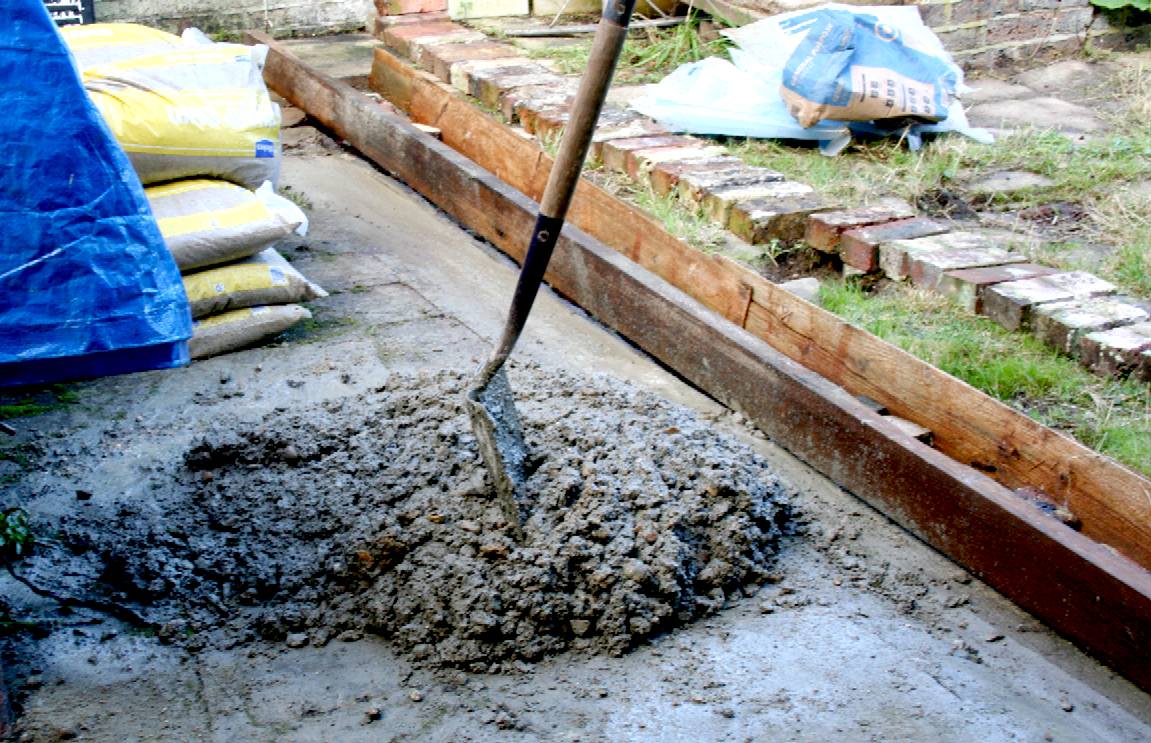
MIXING - We mixed up four and a half bags of ballast to one bag of Blue Circle general purpose cement. We also added a waterproofing solution to the mixing water. Having rammed the hardcore into the stabilized earth we then wet the rubble so that the concrete stuck well. This also helps flow. We tamped the concrete with a length of 3 x 3" timber, to compact the mix and fill any voids. You are better off using a cement mixer. Mixing by hand is back-breaking stuff to be avoided at all costs.
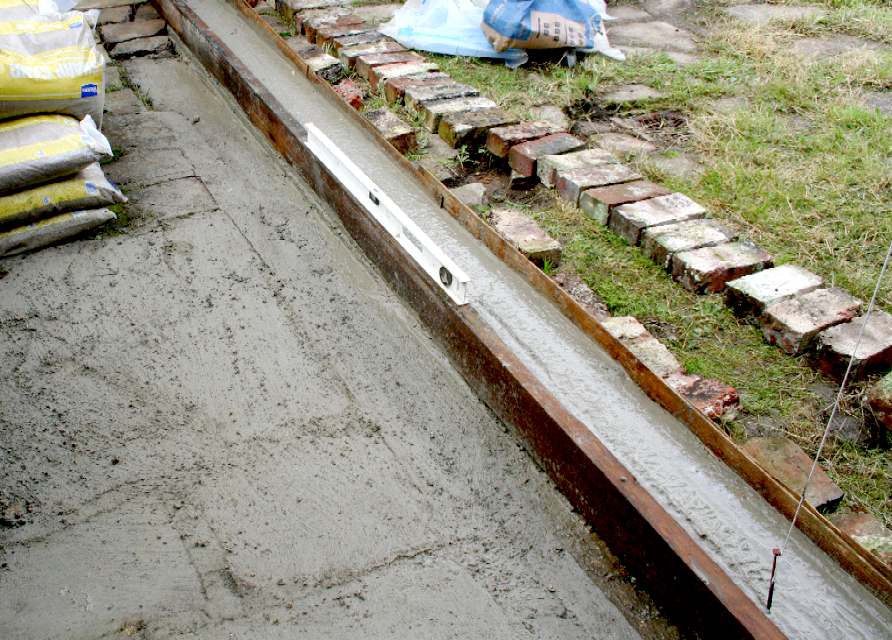
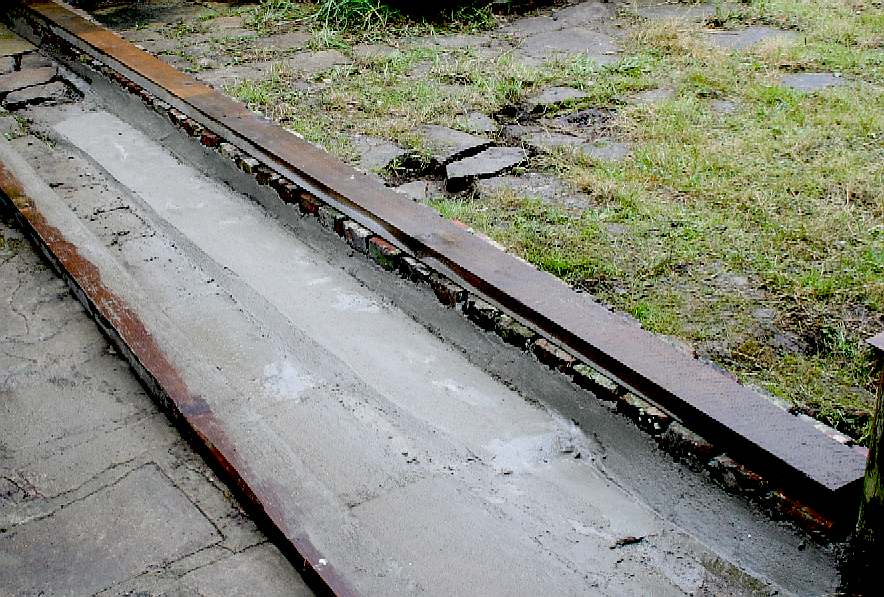
CONCRETE - Pour, or shovel in the concrete mix and use a spirit level to check that the spread is reasonably even. If not you may have trouble laying the bricks.
WET WEATHER - If it starts to rain before the mix is cured, cover the wall with polythene or a tarpaulin.
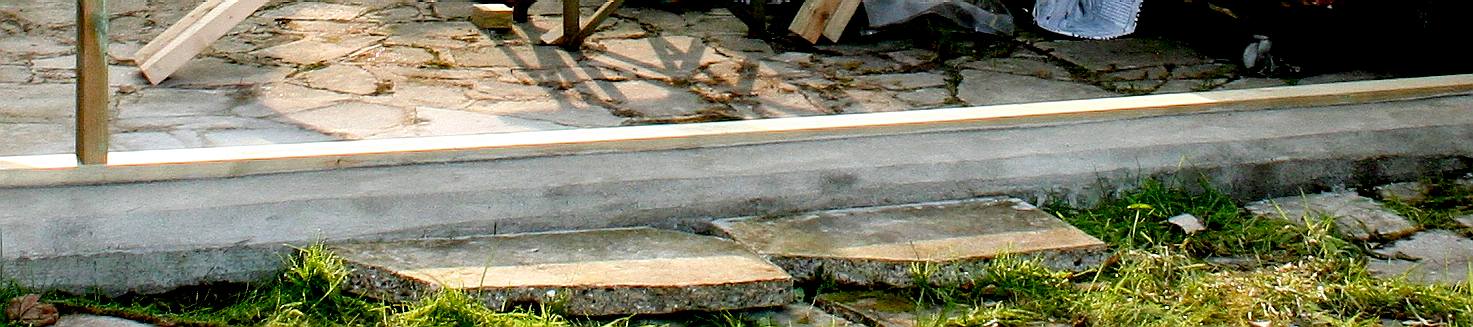
BRICKLAYING - It took 40 bricks side by side to build this small wall. We used sharp sand and once again a waterproofing additive. Sharp sand is not only stronger in the bond, but also has waterproof qualities, where builders sand is relatively porous. Builders sand is though, much easier to lay bricks with - hence the name. Note that where we have in effect screeded over the original footing, how much this shows up the slab floor adjacent as being uneven. There will be puddles until the glass roof goes on.
A WALL - Finally, you will have a wall onto which you can bed your base frame timbers. Make sure you insert a damp proof course (DPC). In the old days this would be a layer of slate (as with the rest of the building. Today that is a membrane of plastic, or bitumen impregnated material. We've used old bricks to achieve that country look. These bricks are hand made, so all slightly different in size. Modern machine molded bricks are identical in size and potentially stronger, provided that quality clay is used.
RENDERING - This is what the wall looks like with the base timber in-situ and a nice PDC installed. The bricks are then rendered with sharp sand and waterproofing admixture to match the existing render and so enhancing the original character of the buildings.
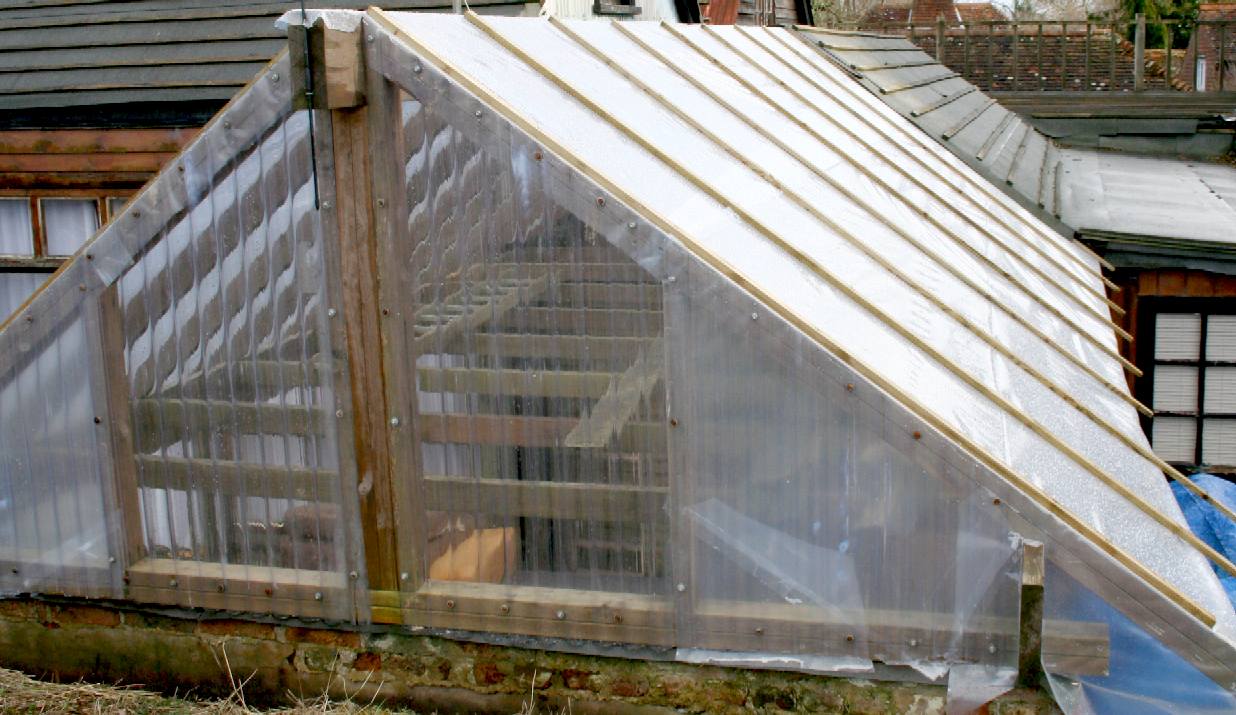
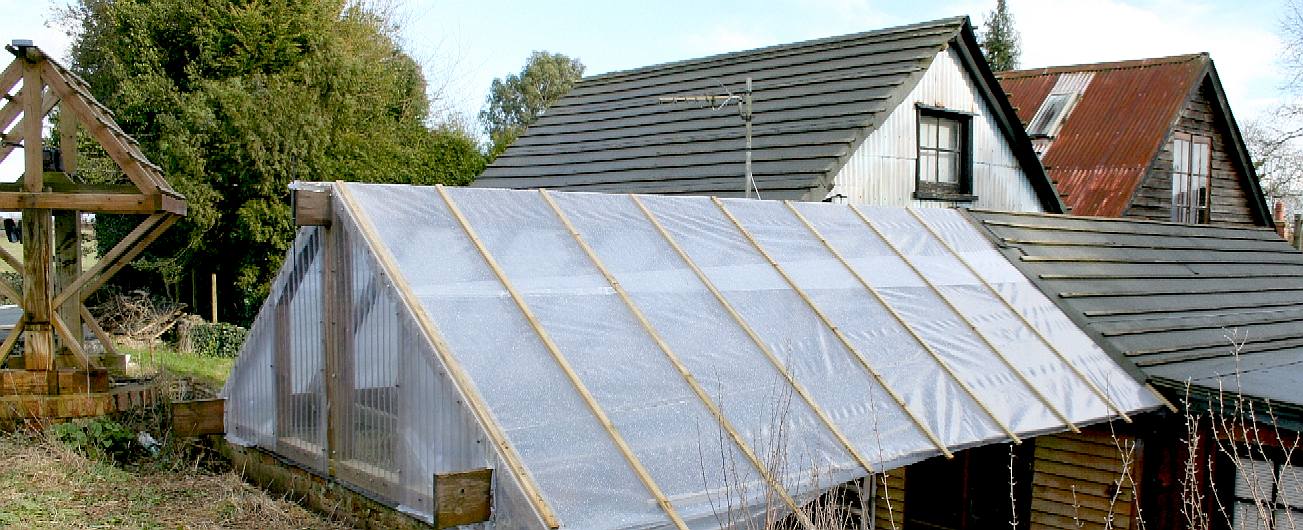
POLY TUNNEL - Glass or polythene? We are on a tight budget, so it's light protected polythene as used on poly tunnels in agriculture. On the end we've used some old corrugated acrylic sheeting to protect the polythene from stones and sticks from when the grass is cut. Glass will look better but is way more expensive if you are building an affordable house. The money you save on heating can go toward putting double glazed glass in four or five years time.
BATTENS - Amateur polythene stretching is never quite as good as when a professional does the job. We learned by doing, only getting it right at the very end of the job. But then, it will still work. We've clamped down the polythene using the same battens that we'll use if we get around to putting glass in. There again, they will be good for more polythene in about 10 years.
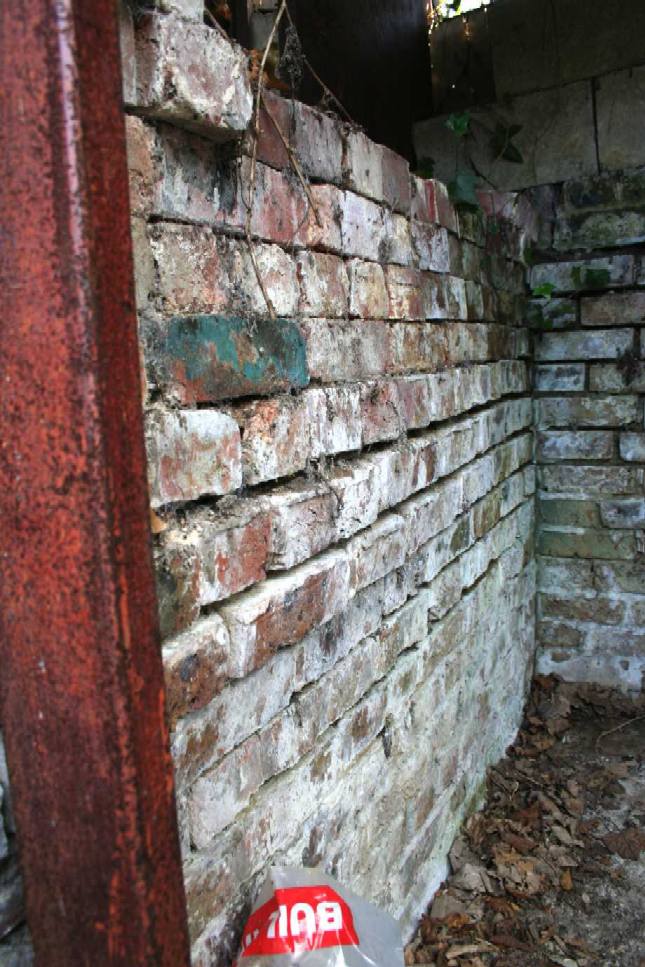
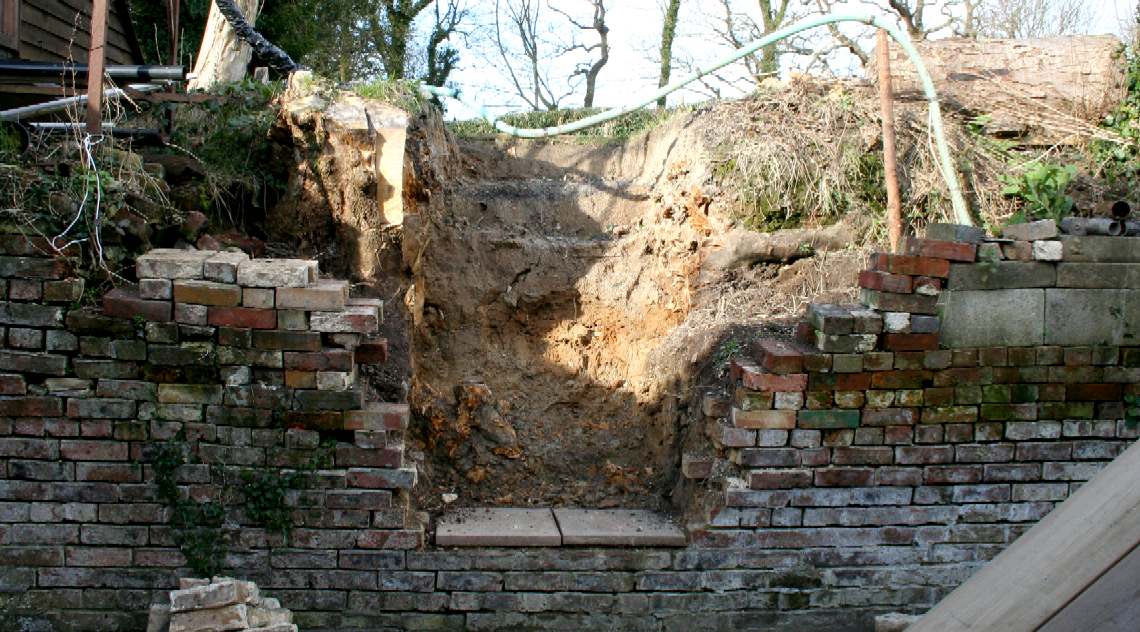
DAMAGED BRICK WALL - This wall has been badly damaged by sycamore roots as a result of Wealden District Council placing a Tree Preservation Order on what we are sure you will know are weed trees. To say that this was a rather unusual move by a local authority would be an understatement.
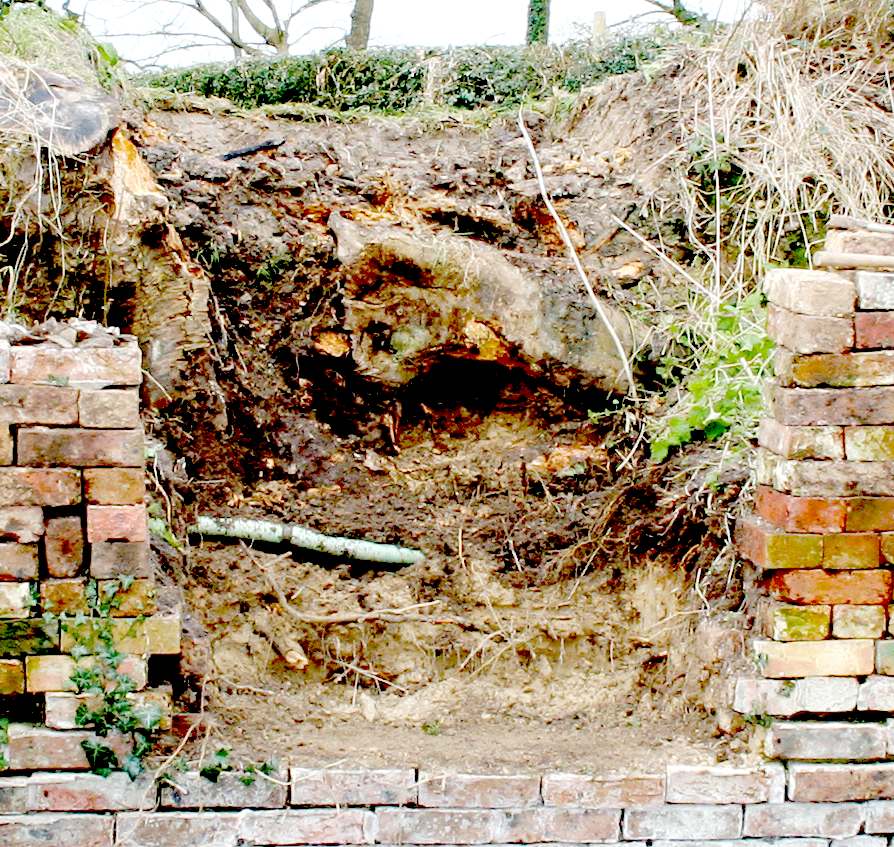
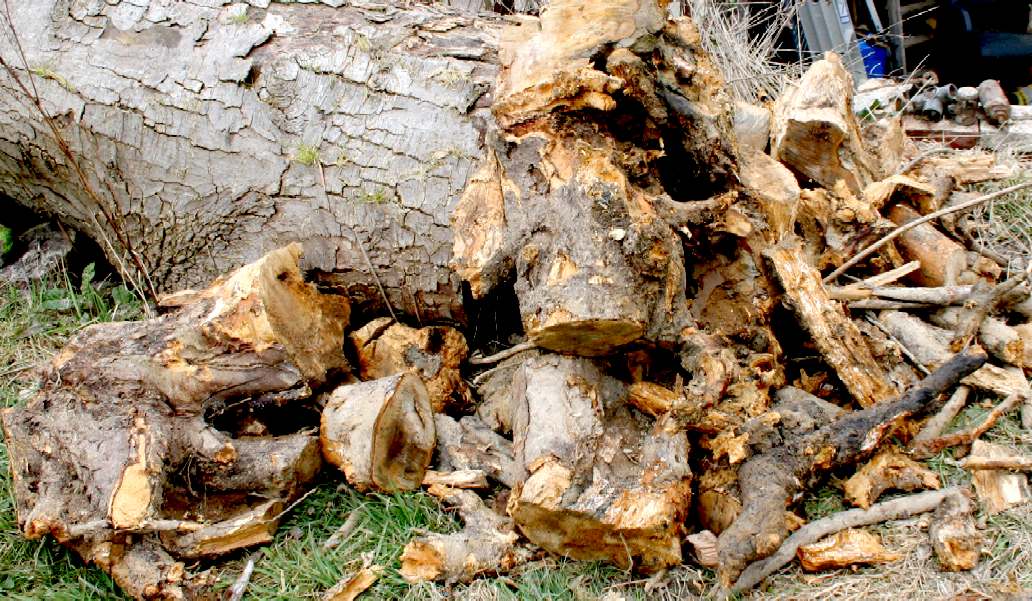
DAUNTING TASK - Anyone who has ever removed a tree will know that the roots are the hardest things to get out. In this case there were quite a few broken bottles from the turn of the century - the glass making the job even more unpleasant.
HUGE ROOTS - Take a look at the size of these roots. Nobody in their right mind would try to protect a weed tree that was this close to a wall - let alone a historic building. But, that is what Wealden did - and it was all because of who owned the building at the time. It is thought that some of the neighbours at the time, were well connected in the Parish Council and that that factor influenced the District Council to use their authority selectively. Shame on you WDC.
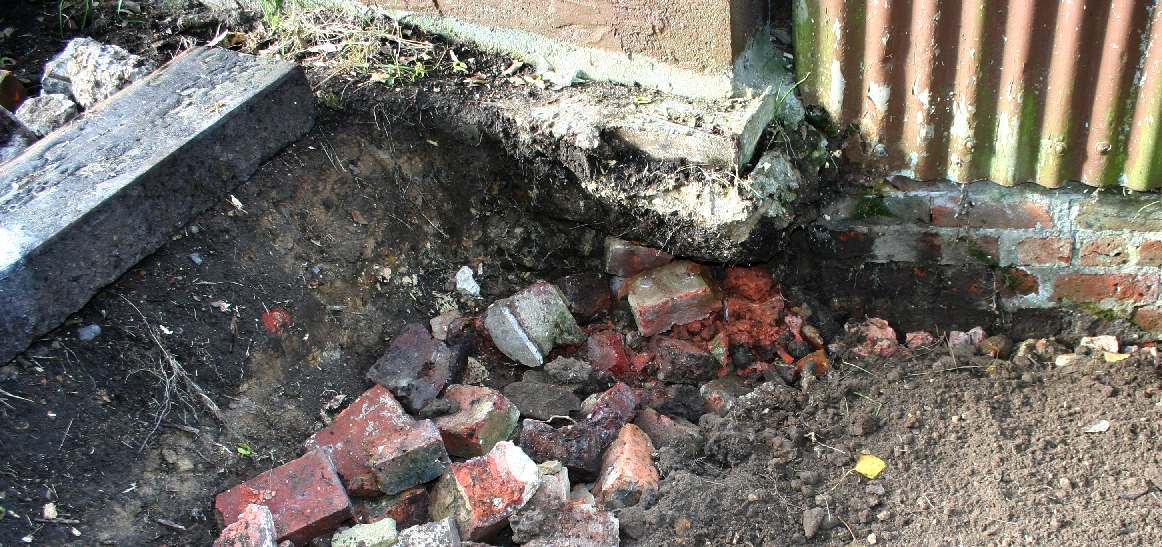
DIG DEEPER - While excavating to cut out the roots of the weed sycamore trees, we found layers of coke. Coke is the by-product of the coal they used for the gas engine that generated electricity on this site from 1909 until 1936. In those days petroleum and diesel was not so easy to come by and very expensive. You can clearly see the coke under the clay, and also under the nuisance roots.
ARCHAEOLOGY - When excavating on an important historic site like this, you must document all of the finds, not matter how seemingly irrelevant. We also found a robust spring, no doubt from one of the gas engines. We also found many old glass bottles, one of which was intact.
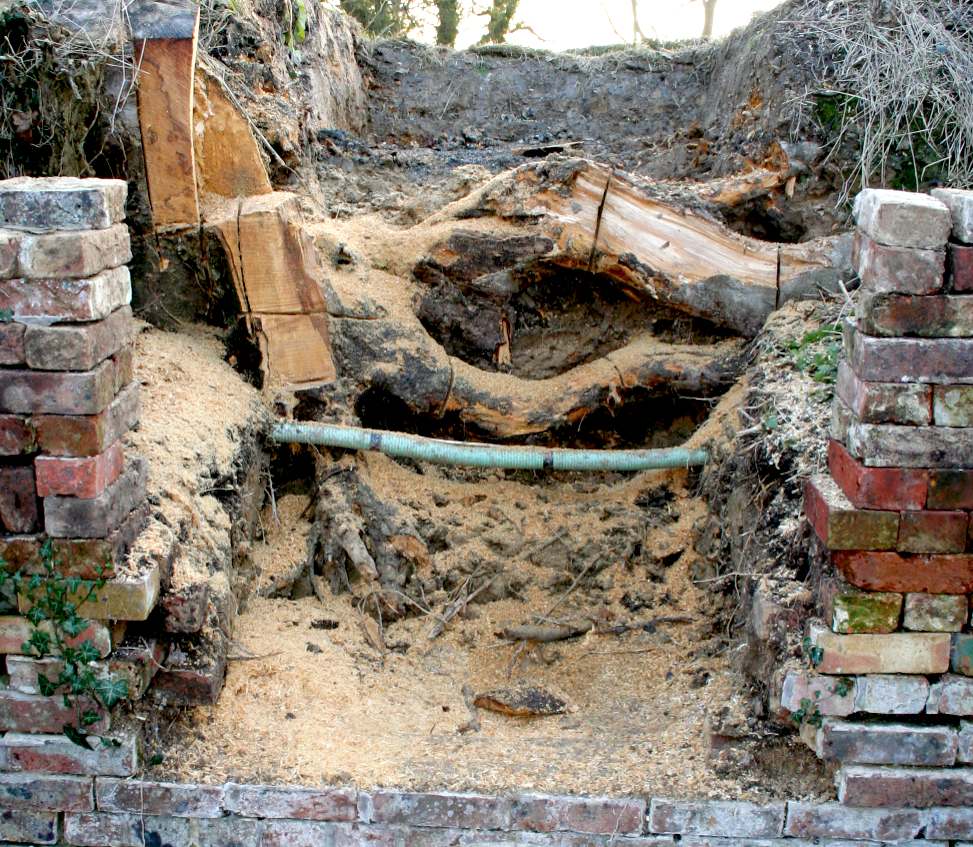
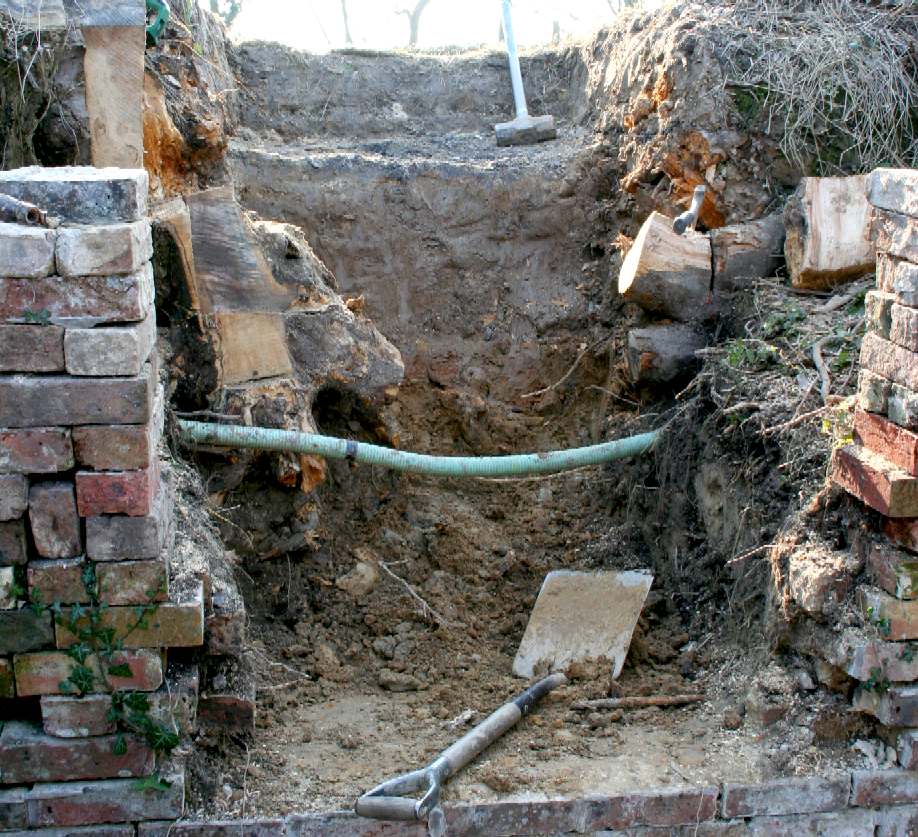
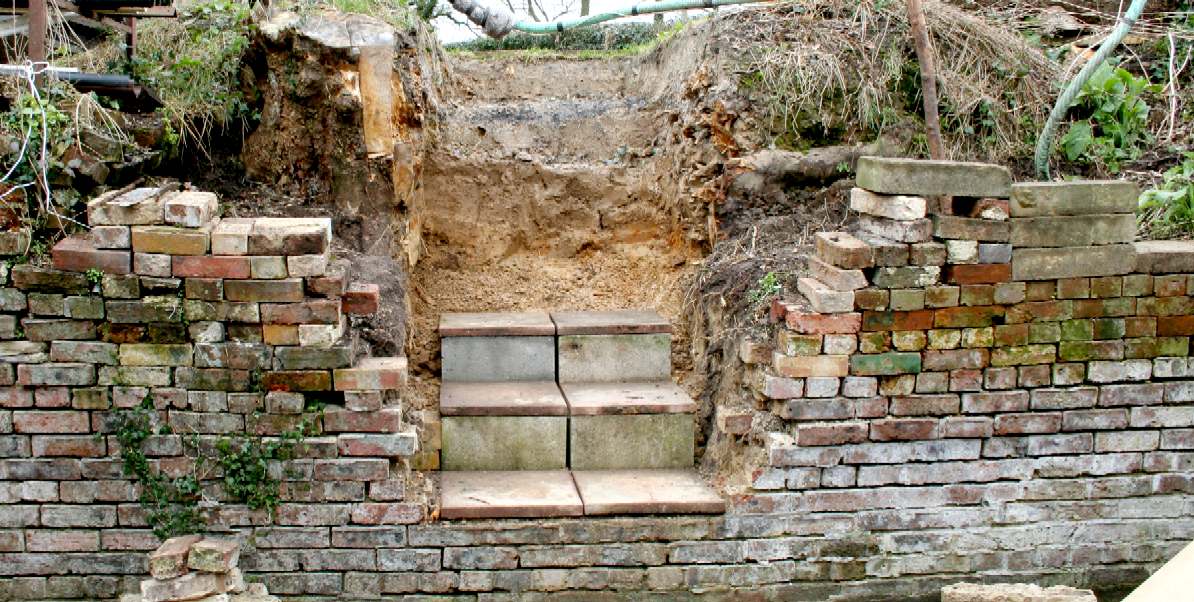
CHAINSAW - The roots of this sycamore were smack in the path of the planned steps, and as you can see they are substantial. Using tools more suitable for an archaeological dig, they were exposed. Once clear of most of the clay and stones, it was possible to use a small chainsaw to cut away and through the main timbers. Note the water pipe that we had to be careful not to cut through. When using a chainsaw close to mud and clay, do not go further than the roots. It is tempting to cut right through and into the soil. If you do so, you will blunt the chain, meaning at least 30 minutes sharpening - or worse - a new chain.
CHAINSAW - Clay and stones will destroy any chain and bar. Be sure to dig around the roots to remove as much soil as possible. Keep the chainsaw topped up with oil and lubricate the tip bearing regularly. In this picture you get an overview of progress - and can see the various layers of archaeology.
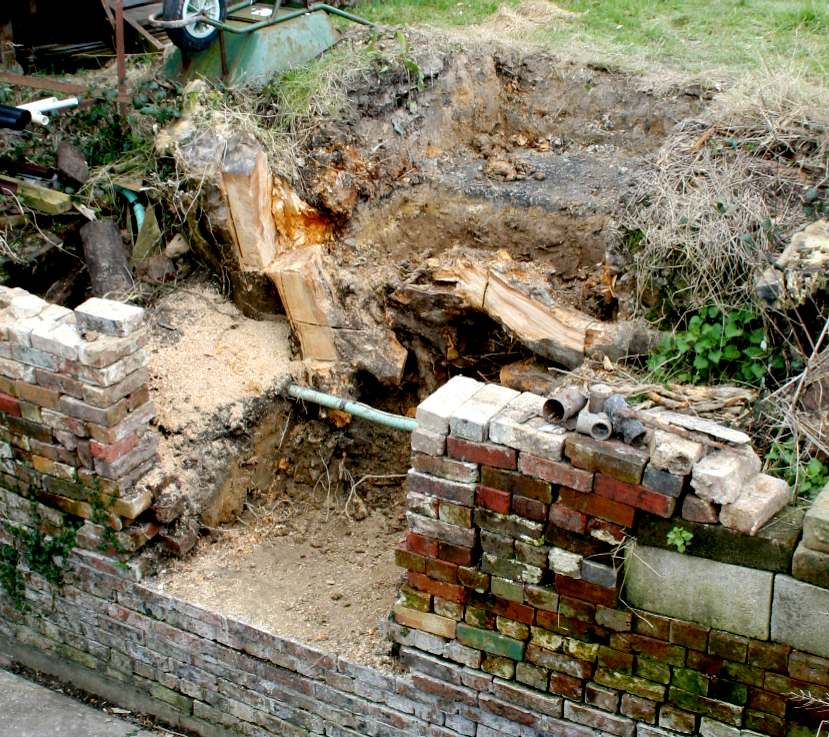
DIVIDE & CONQUER - As with any problem, if you keep chipping away at it from different angles, you will eventually prevail. In this picture the main problem root is cut through and removed. The next stage is to widen the banks and dig around the roots growing down on the left. A sledge hammer is very useful for persuading shoot roots to part company with the stem. We also use a sharp hand axe for the smaller rascals.
VANQUISHED - The large horizontal root is finally cut through, with just some slicing needed to take the walls out by nine inches.
HANDRAILS WEST - These timbers are a bit hefty for handrails, but you get the idea - it is starting to look like garden steps, rather than a muddy bank.
ROTTEN WOOD - This is the pile of root parts, representing a buckled wall, that need not have been so bulged if not for the naughty TPO, and a lot of elbow grease.
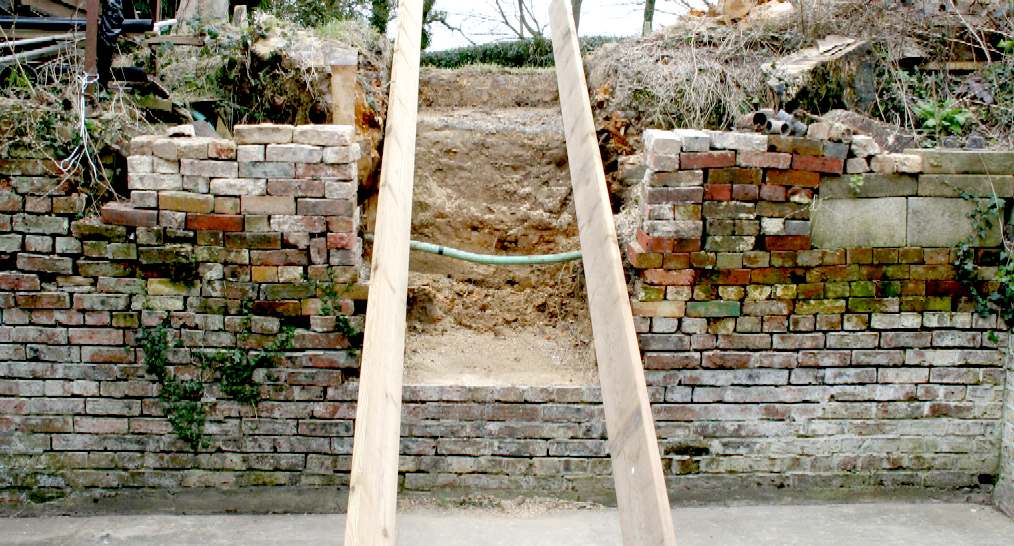
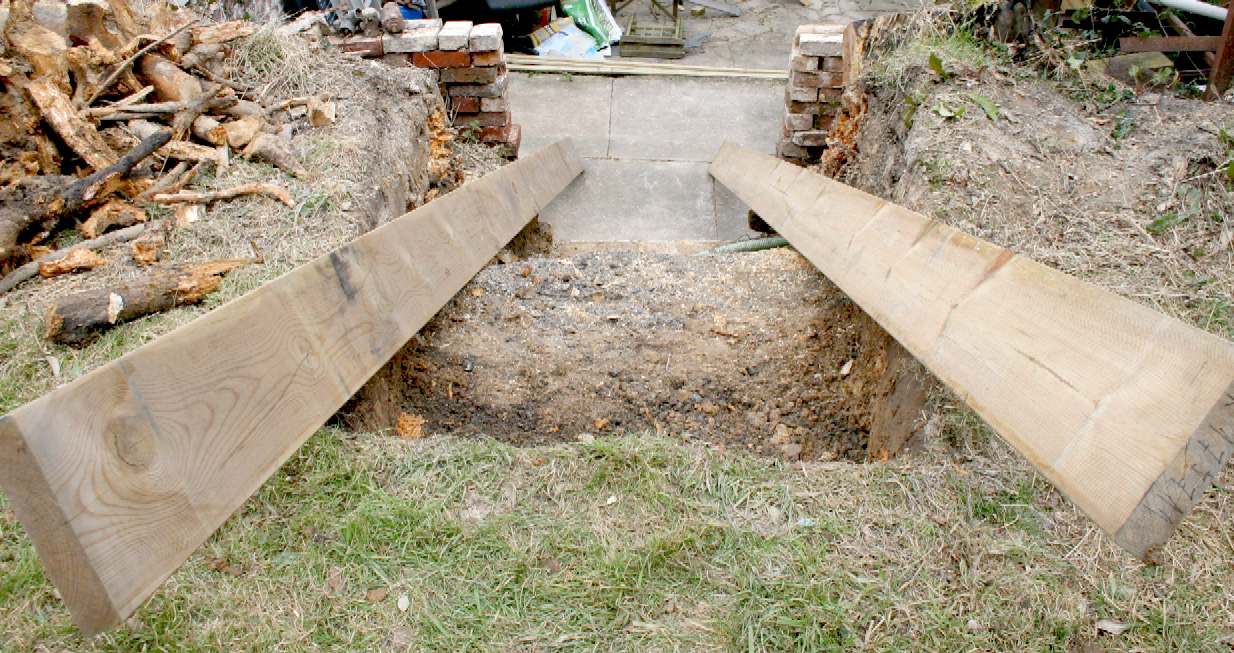
HANDRAILS EAST - Looking from the grass bank down into the courtyard. What a difference it will make have a more convenient access.
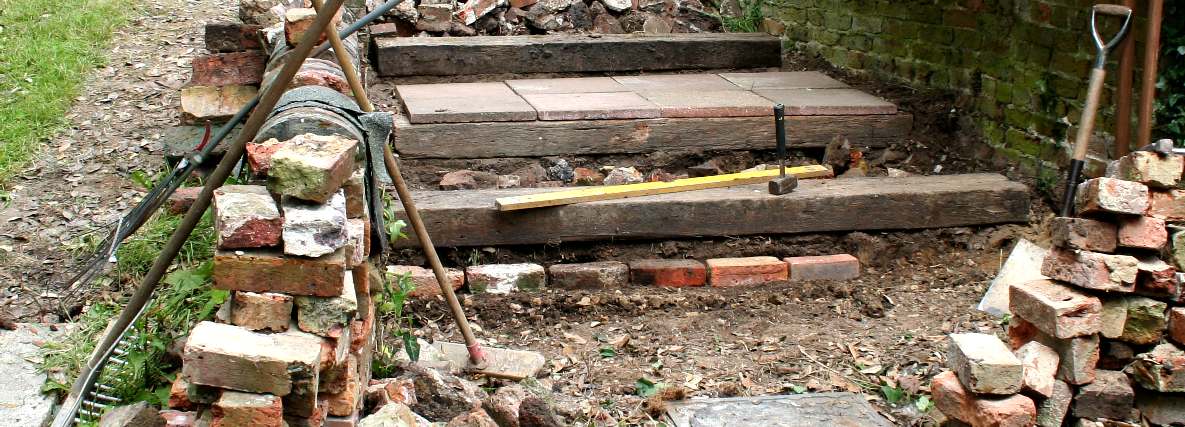
STEPS - Not permanent yet, but at least two slabs are in as a base to work from. The water pipe has been lifted high into the air. It will be repositioned once the steps are completed. There is still a deep-rooted portion to the sycamore roots that you can see just above the slabs on the left.
STEPS - Still not permanent yet, but a couple of steps have been put in to test the slope. The pesky tree root was removed with a combination of hand axes, shovel and a serious sledge hammer. These rises proved to be a little demanding - and the first step needs to come down a two courses.
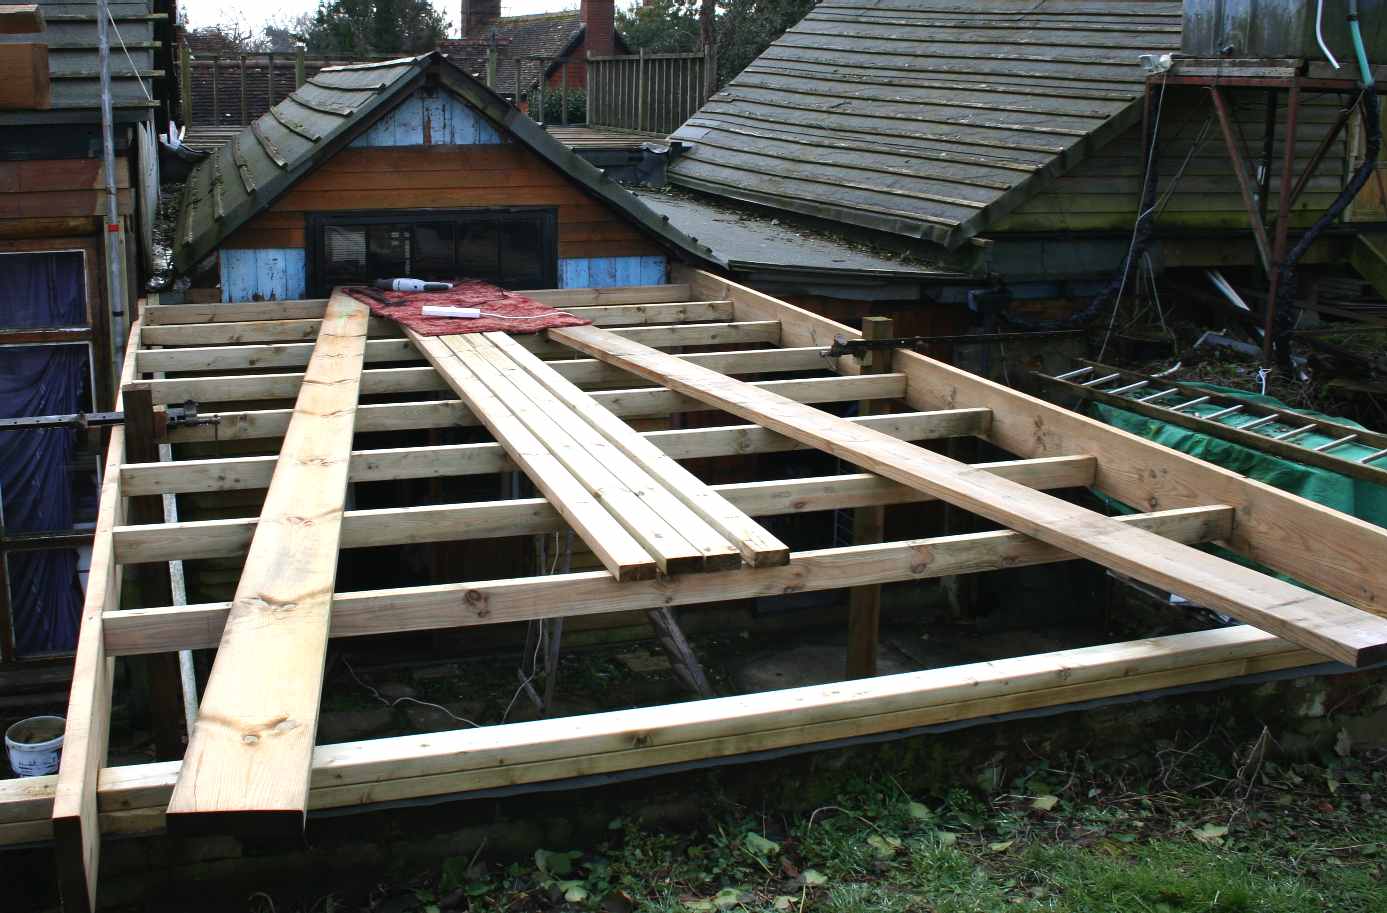
TIMBER FRAME - The opposite end to the steps, will have twin doors opening out onto a courtyard. Use treated timbers wherever practical. When fixing an end timber to a retaining wall, be sure to include a vertical DPC. This is an in progress picture with some of the uprights (4"x2") cut ready for fitting and with the door timbers (2"x2") recently delivered. You can also see two beams (9"x2") that will reinforce the centre beam - to take the loads of snow and high winds with plenty to spare. Maybe preparing for snow is wishful thinking with climate change making that a rarity in the south of England.
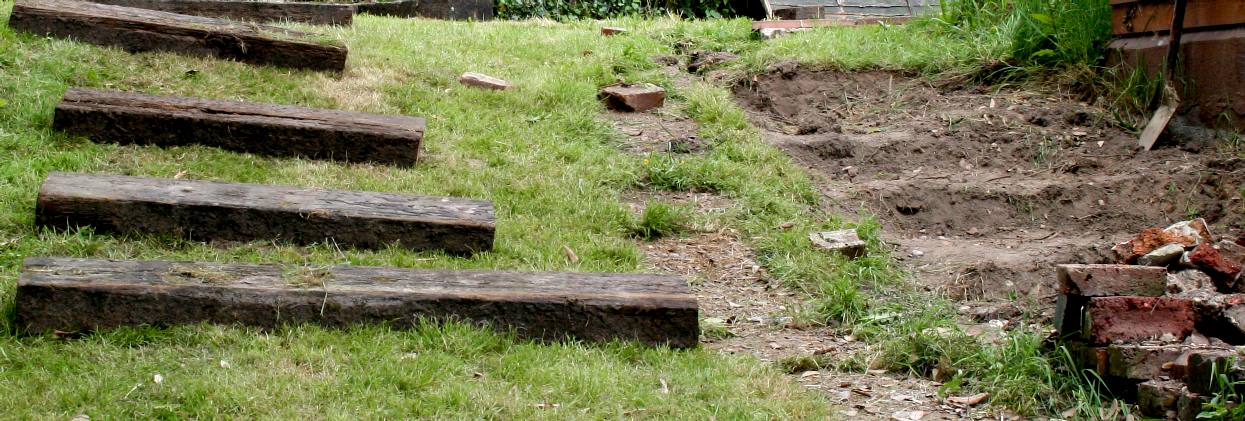
SLEEPERS - On the other side of the slope we need steps just as badly. We used sleepers to get us going on the layout. Genuine railway sleepers are surprisingly rot proof and pretty heavy. So watch that back, or move them in pairs if you are not Arnold Schwarzenegger.
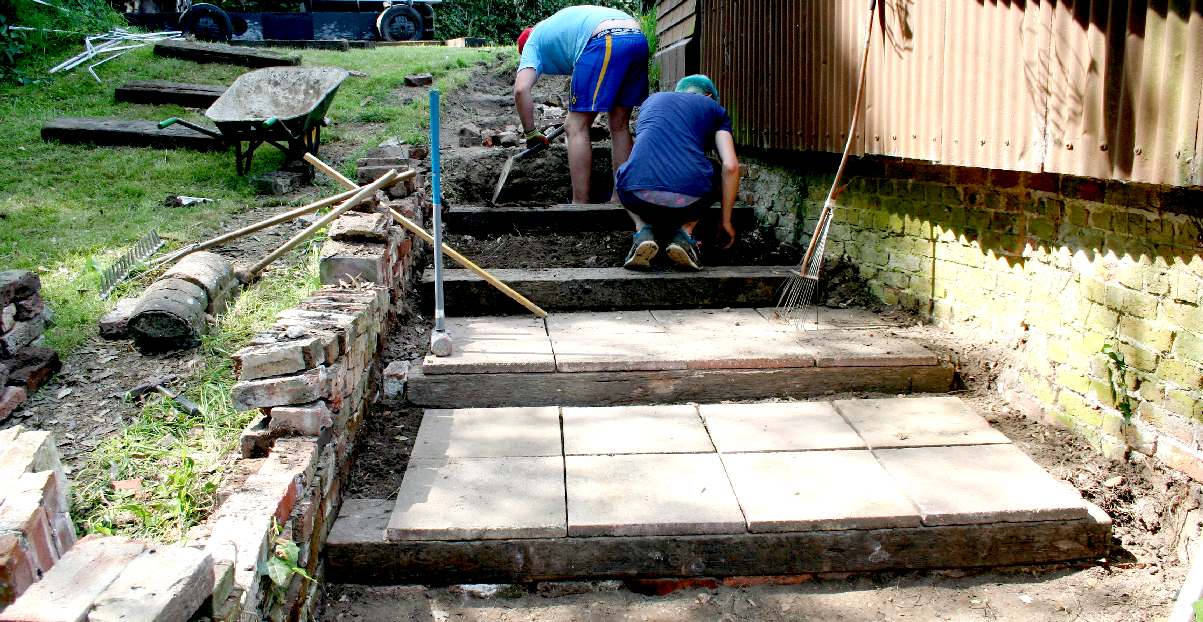
FIRST STEP - The first sleeper is bedded down onto a course of bricks. Hardcore (broken bricks and concrete) is pummeled in behind and then paving slabs are laid on a layer of earth or sand.
STAIRWAY - In not very long we had two steps. They are nearly a meter deep, taking two slabs to reach the next sleeper. The sides will be filled in with cut slabs and/or cement. The wall to the left needs some attention. It was discovered around 30 years ago when excavations first began on this site. At the foot of the stairs is an old ice well. That area will be concreted to make a feature of this historic reminder as to why refrigerators are so important.
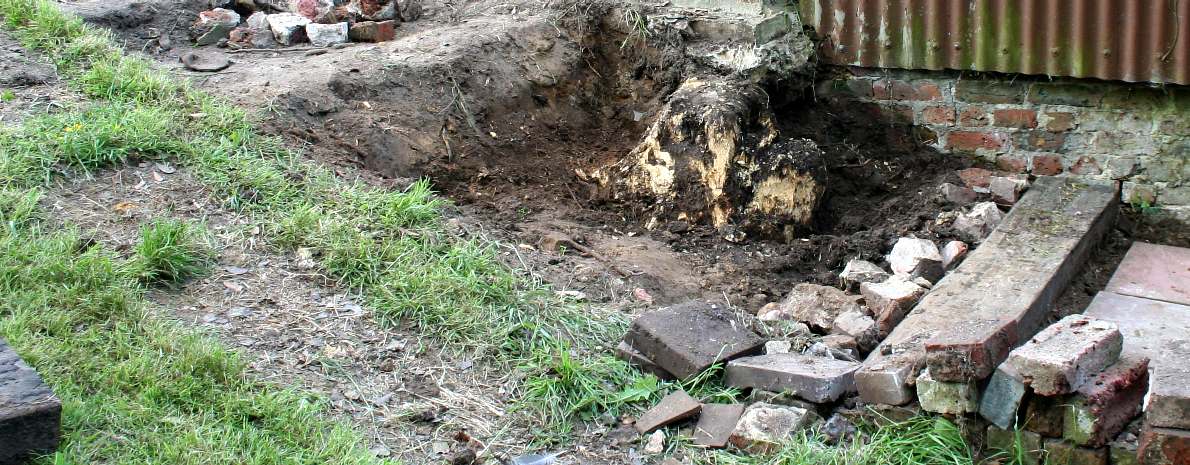
STUMPED - Rain usually halts play. In our case it was an old tree stump that was buried beneath the surface. The tree had been removed over fifteen years previously, but rather amazingly, the stump was still relatively hard in places for a hand axe. We may need to get the chain saw out again : (
UN-STUMPED - What looked a daunting task, proved to be relatively easy. With around 10 or 12 swings from a really big sledge hammer, the stump was divided and conquered. this of course left a squigy void that had to be rammed with hard core, soon to be back filled with concrete.
BRICK PILLAR - Well, that's it all laid out in principle. In reality, the brick wall to the left of the steps - and the pillar - will need some footings in places and rebuilding with fresh mortar in others. The ravages of time has long since buried the original walls in this location, with plant life and other unsympathetic works taking its toll. Almost every time we dig down we discover another wall or footings.
GLASS AREA - One secret to heating your house affordably is plenty of glass area facing the sun. Using a renewable resource like timber from properly managed forests is a sustainable practice and wood locks up carbon. Thus, timber buildings are good for the environment and help to stave off the dreaded climate change that is rampant at the moment. This conservatory area is constructed on the site of the old generating building that was part removed in 1936 to remove the National gas engine. The footings and brick wall base are original and the height faithful to the original. Visitors to the museum can see the underground water storage tank in safety and see an this disused generation station from before 1909, including the historic coal bunker that stored the coal for conversion to gas (and 2nd World War bomb proof shelter) being put to good use over one hundred years later. Copyright photograph © Lime Park Heritage Trust February 2017
BESPOKE FRAMES - Skilled craftsmen carefully select high grade timber to make the frames to accept locally made double glazed units from the finest glass, the aim being to collect as much free heat as possible, and yet keep the visitors to the Museum cool on hot summer days. In the center of this unit there is the hatch that leads to the subterranean water holding tank that condensed water vapour and cooled the generating machinery. The holding tank was fed from the gutters and down pipes via a water filter - just like a huge water butt that you might see on a garden shed, except underground. The water chamber will be lit as a feature for history and archaeology students to be able to see clearly. Copyright photograph © Lime Park Heritage Trust February 20 2017.
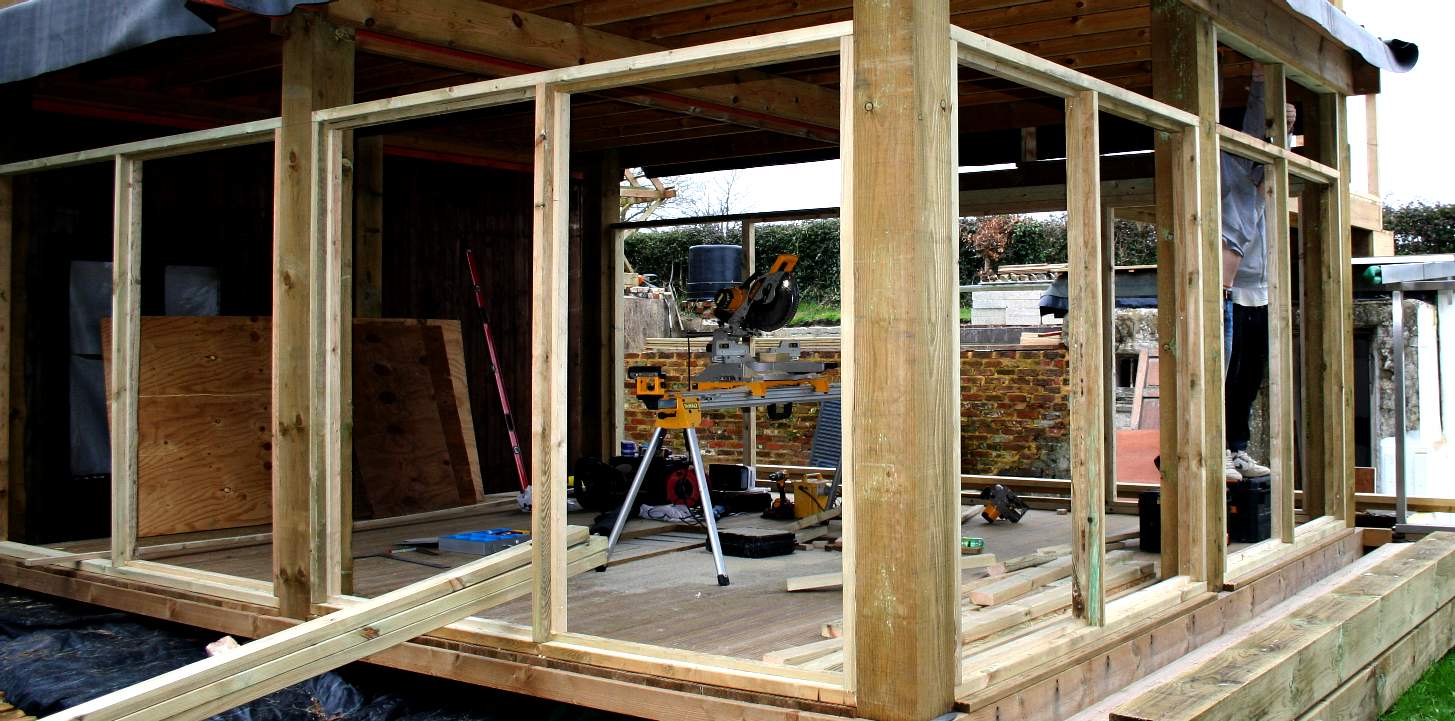
The Solar Conservatory is beginning to take shape. The rafters have now been cut and fixed with just the gable end to go before the heat collection panels can be hung from the main support (ridge) beam. Be sure when designing a structure that the timbers can carry the load. Triangulation is important here. In this case the joists are also tie beams that prevent the walls from splaying outwards. We are using old steel radiators, salvaged from another job so saving around £150, where these items would have been disposed of had we not stepped in. Always recycle where you can. Do your bit for the planet.
Timber for the conservation has come from a number of suppliers, to include Wenban-Smith in Lewes and Travis Perkins in Eastbourne. Wenban-Smith supplied the feather edge boarding that is pressure impregnated (tanalith treated) in their own plant. Their delivery service is superb. Tanalith is the trade name for a mixture of chemicals to rot proof timber, otherwise known as CCA.
Even though treated timbers were used, they are to be surface treated with a PTI based formula mixed with stains to match existing timberworks. Traditional treatments such as brush applied creosote do not perform nearly as well as modern replacements.
WOOD TREATMENTS
Chromated
Copper Arsenate (CCA) is a wood preservative that has been used for timber treatment since the mid-1930s. It is a mix of chromium, copper and arsenic (as Copper(II) arsenate) formulated as oxides or salts, and is recognizable for the greenish tint it imparts to timber. CCA was invented in 1933 by Dr. Sonti Kamesam, an Indian scientist, and was awarded its first
patent (British) in 1934.
Creosote is a traditional coal-tar-based preservative that has been commonly used for telephone poles and railroad ties. Creosote is one of the oldest wood preservatives, and was originally derived from a wood distillate. These days virtually all creosote is manufactured from the distillation of coal tar. Creosote is regulated as a pesticide, and is not usually sold to the general public. It is still used for railroad ties (also called railway sleepers and cross ties) and utility poles. Creosote has now been replaced by a number of other chemicals for above ground treatment, such as PTI.
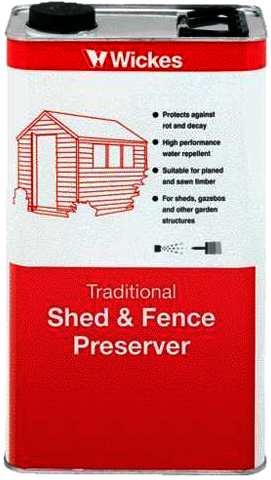
PRESERVER - Wickes no longer stock this treatment. Fortunately, Ronseal have a great range of treatments for gardeners and wood lovers.
PTI
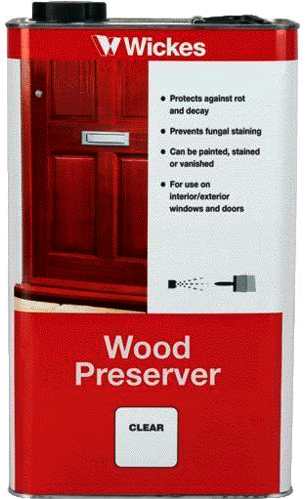
Recent concerns about the health and environmental impacts of metallic wood preservatives have created a market interest in non-metallic wood preservatives such as Propiconazole-Tebuconazole-Imidicloprid better known as PTI. The American Wood Protection Association (AWPA) standards for PTI require a retention of 0.018 lb/ft3 (PCF) for above ground use and 0.013 lb/ft3 when applied in combination with a wax stabilizer. The AWPA has not developed a standard for a PTI ground contact preservative, so PTI is currently limited to above ground applications such as decking. When mixed with Permethrin and wax stains, PTI treatments are very effective. One such commercial preparation is supplied by Wickes in the UK. We have found this to be an excellent product and easy to spray apply - but be sure to wear protective masks and keep away from cats. It can be fatal to cats. We have not seen our local grass snake since treating the well last year. Was it the cat or the PTI?
(Permethrin is a common synthetic chemical, widely used as an insecticide, acaricide, and insect repellent. It belongs to the family of synthetic chemicals called pyrethroids and functions as a neurotoxin, affecting neuron membranes by prolonging sodium channel activation.)
Yet more timberwork on site. This is a simple lean-to at the moment, but when completed it will make a nice stable or garage.
STABLES - If ever there is a change in policy with reversion to pony and trap, this lean-to will make a nice conversion to a stable. Using horses for transportation is of course sustainable - even if a step backward in time - but what a lovely trip that can be if you like horses. The building adjacent, now called the Old Rectory (converted to residential use in 1948), was the original stable block for the estate, before the Baron de Roemer went over to an Armstrong Sideley motor car and chauffeur, leaving his stables redundant.
|
|
|
This website is Copyright © 2017. All rights reserved. All other trademarks are hereby acknowledged. Contact Us www.cherrymortgages.com
|